
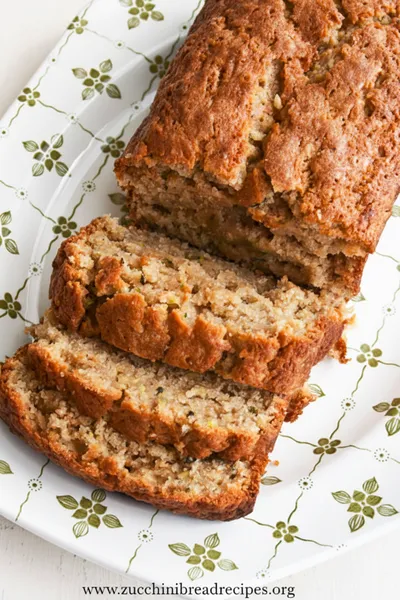
The tradition of baked pancakes dates back centuries to European kitchens where large families needed efficient ways to feed everyone. Unlike traditional stovetop pancakes that require constant attention, baked versions allowed cooks to prepare multiple servings simultaneously while tending to other morning tasks. This method gained popularity in American kitchens during the 20th century as busy households sought time-saving breakfast solutions that didn't sacrifice flavor or nutrition.
Why You'll Love It
-
Make-ahead convenience - prepare the batter night before
-
Perfect portion control with individual servings
-
Customizable with your favorite mix-ins and toppings
-
Higher protein content keeps you satisfied longer
-
Great for meal prep - stores beautifully for days
"My whole family adores these! The perfect grab-and-go breakfast that actually keeps us full until lunch."
Essential Ingredient Guide
- Protein powder: Choose a vanilla or unflavored variety that mixes well. I find whey or plant-based blends work beautifully. The protein gives these bowls staying power that regular pancakes just can't match.
- Oat flour: Provides a tender crumb and wholesome fiber. You can make your own by grinding rolled oats, which gives these a lovely, rustic texture that's both satisfying and comforting.
- Greek yogurt: Adds moisture and extra protein. The tanginess balances the sweetness perfectly. Full-fat gives the richest flavor, but any variety will work well here.
- Eggs: They're the binding agent that gives these bowls their structure. Room temperature eggs incorporate better - I usually take mine out when I preheat the oven.
- Maple syrup: Just enough to lightly sweeten without overpowering. The flavor blends so naturally with the oats and vanilla. Real maple syrup makes all the difference.
- Baking powder: The magic ingredient for that perfect rise. Make sure yours is fresh - I test mine occasionally by dropping a bit in water to see if it bubbles vigorously.
 Healthy
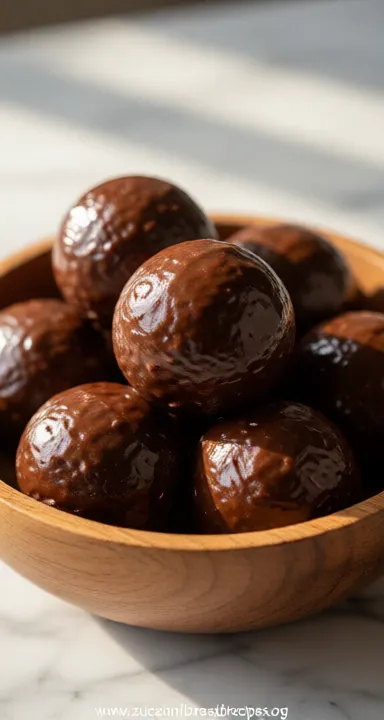
Energy Balls: Healthy Easy Snack Recipe
A calm, no‑bake snack that keeps you energized with wholesome nuts, dates, and a whisper of chocolate.
Complete Cooking Process
-
Ingredient Readiness:
Everything should be at room temperature for the smoothest batter. Cold ingredients can make the batter seize up a bit. I leave my eggs and yogurt out for about 20 minutes while I gather everything else. The dry ingredients get whisked together thoroughly - you want that baking powder distributed evenly so every bite rises perfectly.
-
Flavor Development:
The magic happens when wet and dry ingredients combine. Don't overmix - a few lumps are perfectly fine. The vanilla and maple syrup meld together as they rest, creating this lovely base flavor that permeates the entire bowl. It's amazing how the simple combination of these ingredients creates something so comforting.
-
Texture Control:
The oven temperature is key here. Too hot and the outside burns before the inside cooks; too low and they won't get that beautiful golden crown. The bowls should rise gracefully, with little bubbles forming on the surface that tell you they're cooking just right.
-
Finishing Touches:
That moment when you pull them from the oven - the tops are domed and golden, and they've pulled away from the sides slightly. Let them rest in the pan for a few minutes; they continue cooking from residual heat and set up perfectly for easy removal.
-
Serving Timing:
These are best served warm, when the edges are slightly crisp and the centers are still tender. But honestly, they're wonderful at room temperature too - the flavors seem to settle and deepen as they cool.
-
Grease the bowls well - I use a pastry brush with melted butter for even coverage
-
Don't overfill - leave about ¼ inch at the top for rising
-
Rotate halfway through baking for even browning
-
Test with a toothpick - it should come out with moist crumbs, not wet batter
Pro Tips
The first time I made these, I was so nervous they wouldn't turn out right. But they puffed up so beautifully, creating these lovely individual servings that felt special. Now I make them weekly - they've become part of our routine.
What I love most is how versatile they are. Sometimes I'll stir in some blueberries or chocolate chips, other times I'll sprinkle the tops with cinnamon sugar before baking. They always turn out wonderfully, and the house smells like Sunday morning even on a Tuesday.
The essence of the dish:
These aren't just pancakes - they're little edible bowls of comfort. The baking method gives them a unique texture that's both cake-like and slightly custardy at the center. There's something so satisfying about having your own individual portion, all golden and puffed, waiting just for you.
A fun fact or historical angle:
Baked pancake variations appear in cookbooks as early as the 1800s, often called 'oven cakes.' Families would bake them in their wood-fired ovens while the fire burned down to cooking temperature, making efficient use of the heat.
Flavor or sensory focus:
You'll notice the gentle sweetness first, then the wholesome oat flavor comes through. The texture is the real star - slightly crisp around the edges where it touched the bowl, tender and almost creamy in the middle. The vanilla scent fills your kitchen in the most welcoming way.
You Must Know
-
Use room temperature ingredients for smooth batter
-
Don't overmix - lumps are okay
-
Grease bowls thoroughly for easy release
-
Let cool slightly before removing from pans
Frequently Asked Questions
→ Can I make these without protein powder?
Absolutely. Just increase the oat flour by ¼ cup and add an extra tablespoon of Greek yogurt. They'll still be delicious, though slightly less protein-packed.
→ What's the best way to store leftovers?
They keep beautifully in an airtight container for 3-4 days. I often make a double batch for the week. They reheat wonderfully in the toaster oven.
→ Can I freeze these pancake bowls?
Yes! Freeze them on a baking sheet first, then transfer to freezer bags. Reheat directly from frozen in a 350°F oven for about 10 minutes.
→ What protein powder works best?
I prefer vanilla whey or a neutral plant-based blend. Chocolate protein powder would work too if you want a chocolate variation - just reduce the maple syrup slightly.
→ Can I use regular flour instead of oat flour?
You can, but the texture will be different - lighter and more cake-like. Oat flour gives them that wholesome, substantial feel I love.
→ What toppings do you recommend?
Fresh berries, a dollop of Greek yogurt, nut butter, or even a sprinkle of cinnamon sugar. They're also wonderful plain - the flavor stands on its own.
Nutrition Facts
per serving
185
Calories
12g
Protein
20g
Carbs
6g
Fat
Taste Profile
Gently sweet with wholesome oat and vanilla notes
Ingredient Substitutions
Don't have an ingredient? Try these alternatives
Texture will be more traditional pancake-like
Will still be delicious but lower in protein
Maintains moisture and tanginess
Recipe Variations
Try these delicious twists on the original
Blueberry Protein Bowls
Fold in ½ cup fresh or frozen blueberries into the batter before baking
Chocolate Chip Version
Add ⅓ cup mini chocolate chips for a treat-like breakfast
Common Mistakes to Avoid
Learn from others' mistakes for perfect results
- Overmixing the batter resulting in tough texture
- Using cold ingredients causing uneven mixing
- Overfilling bowls leading to overflow
- Under-greasing bowls making removal difficult
Meal Prep & Storage
Make Ahead Tips
The batter can be prepared up to 24 hours in advance and stored covered in the refrigerator. Stir gently before using. Baked pancake bowls also freeze beautifully for up to 3 months.
Leftover Ideas
Reheat leftovers in a 350°F oven for 5-7 minutes until warmed through. They maintain their texture beautifully when reheated properly.
Perfect Pairings
Serve this with...
Cooking Timeline
Preheat oven, grease bowls, gather ingredients
Whisk dry ingredients, prepare wet ingredients
Combine wet and dry ingredients gently
Divide batter among bowls, place in oven
Bake until golden and cooked through
Cool slightly, remove from bowls, serve
 Healthy
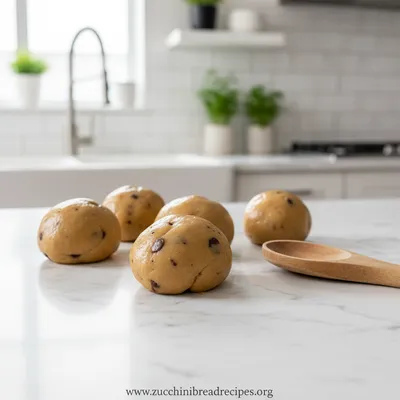
High Protein Cookie Dough
Delicious, chocolatey cookie dough packed with protein for a healthy on‑the‑go treat.
Baked Protein Pancake Bowls Recipe
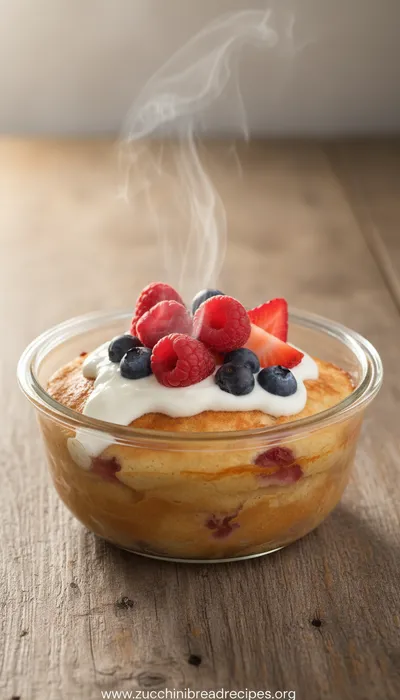
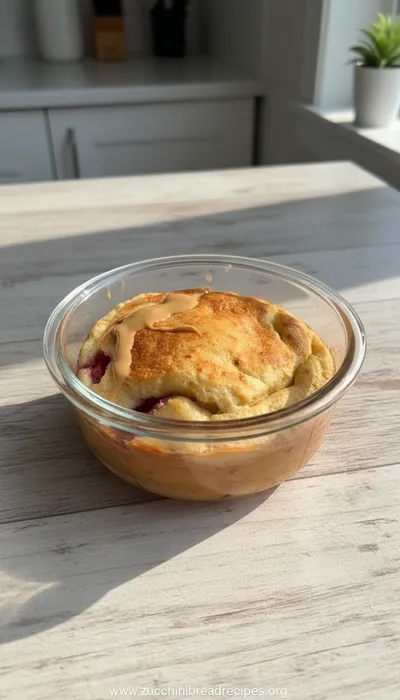
These baked protein pancake bowls are the perfect make-ahead breakfast or nutritious snack that will keep you satisfied all morning long with their fluffy texture and wholesome ingredients.
Timing
Prep Time
10 Minutes
Cook Time
20 Minutes
Total Time
30 Minutes
Recipe Details
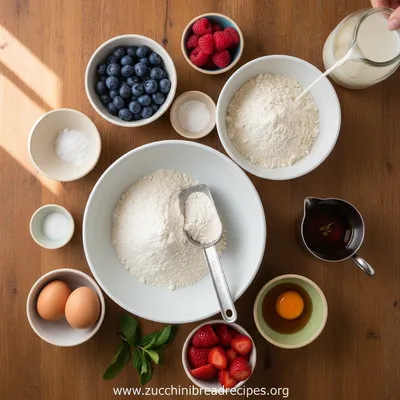
Ingredients
Dry Ingredients
-
01
1 cup oat flour
-
02
½ cup vanilla protein powder
-
03
2 teaspoons baking powder
-
04
¼ teaspoon salt
-
05
½ teaspoon cinnamon (optional)
Wet Ingredients
-
01
2 large eggs, room temperature
-
02
½ cup Greek yogurt
-
03
⅓ cup maple syrup
-
04
⅓ cup milk of choice
-
05
2 tablespoons melted butter or coconut oil
-
06
1 teaspoon vanilla extract
Instructions
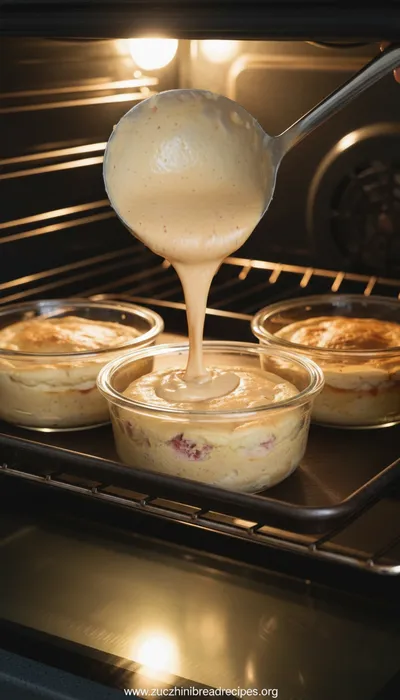
Preheat your oven to 375°F. Grease 6 oven-safe bowls or ramekins generously with butter or cooking spray. Honestly, I use these little ceramic bowls I found at a yard sale - they're the perfect size.
In a medium bowl, whisk together the oat flour, protein powder, baking powder, salt, and cinnamon if using. Make sure everything is well combined - I give it a good 30-second whisk to aerate the dry ingredients.
In another bowl, whisk the eggs until frothy. Add the Greek yogurt, maple syrup, milk, melted butter, and vanilla. Whisk until smooth. The mixture should be well emulsified - you'll see it come together beautifully.
Pour the wet ingredients into the dry ingredients. Gently fold together until just combined - a few lumps are fine. Overmixing can make them tough. The batter will be thick but pourable.
Divide the batter evenly among the prepared bowls, filling them about ¾ full. Bake for 18-22 minutes, until golden brown and a toothpick inserted comes out clean. They'll puff up so nicely in the oven.
Let cool in the bowls for 5 minutes before running a knife around the edges and removing. Serve warm with your favorite toppings. They're wonderful with fresh berries or a drizzle of extra maple syrup.
Notes & Tips
-
1
For gluten-free version, ensure your oat flour is certified gluten-free
-
2
Batter can be made night before and stored covered in refrigerator
-
3
These freeze beautifully for up to 3 months
-
4
Perfect for meal prep - make a batch on Sunday for the week
 Healthy
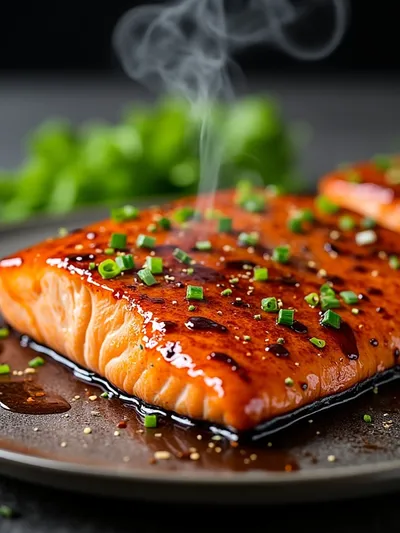
Baked Teriyaki Salmon – Easy Healthy Dinner
A quick baked salmon glazed with sweet‑savory teriyaki, perfect for a wholesome dinner.
Tools You'll Need
-
6 oven-safe bowls or ramekins
-
2 mixing bowls
-
Whisk
-
Measuring cups and spoons
-
Pastry brush for greasing
-
Cooling rack
Must-Know Tips
-
Room temperature ingredients blend more smoothly
-
Don't overmix the batter - fold gently
-
Grease bowls well for easy release
-
Let cool slightly before removing from bowls
Professional Secrets
-
Whisk dry ingredients thoroughly for even distribution
-
Test baking powder freshness for optimal rise
-
Rotate bowls halfway through baking for even browning
-
Use full-fat Greek yogurt for richest flavor

Recipe by
Maya Green🌱🥗 Healthy foodie, vegan baker, and smoothie lover. Sharing guilt-free treats with energy and love 💪💚.
Get Delicious Recipes Weekly
Join 25,000+ home cooks getting our best recipes straight to their inbox.
Free forever • No spam • Unsubscribe anytime