
Overnight oats trace their roots to the Swiss Bircher muesli, created by Dr. Maximilian Bircher-Benner in the early 1900s as a health food for his patients. The concept of soaking raw oats overnight to make them easily digestible and creamy has since traveled the world, becoming a modern staple for those seeking a nutritious, no-fuss start to the day. The addition of brown sugar is a classic American twist, adding a deep, caramel-like sweetness that perfectly complements the humble oat.
Why You'll Love It
-
It’s ready the moment you wake up – no cooking, no mess.
-
The brown sugar melts into the milk, creating a rich, caramel-infused creaminess.
-
It’s endlessly customizable with your favorite fruits and nuts.
-
Perfect for busy mornings or for making a whole week’s breakfast at once.
"I never liked oatmeal until I tried this! It’s like dessert for breakfast, but I feel good about eating it."
Essential Ingredient Guide
- Old-Fashioned Rolled Oats: These are the heart of the dish. They soften perfectly overnight, absorbing the liquid without turning to mush. Don’t use quick oats, honestly, they get too soft and lose their texture.
- Brown Sugar: This isn’t just for sweetness. The molasses in the brown sugar gives a warm, deep flavor that white sugar just can’t match. It melts right into the milk.
- Milk: Whole milk makes it super creamy, but any milk you like works. I’ve used almond milk and it’s just as good, maybe a little thinner, but still delicious.
- Chia Seeds: These little seeds are a wonder. They plump up and help thicken the mixture, giving it a lovely pudding-like consistency. They’re good for you, too.
- Vanilla Extract: A splash of vanilla makes everything taste more like a treat. It rounds out the sweetness and adds a warm, inviting aroma.
- A Pinch of Salt: Don’t skip this. It seems small, but it makes the flavors pop and balances the sweetness beautifully.
 Healthy
Energy Balls: Healthy Easy Snack Recipe
A calm, no‑bake snack that keeps you energized with wholesome nuts, dates, and a whisper of chocolate.
Complete Cooking Process
-
Ingredient Readiness:
The beauty here is that there's no real cooking. You're just mixing. But getting your ratios right is everything. The oats need enough liquid to soften, but not so much that they swim. I always give the jar a good shake after I put the lid on, just to make sure everything is well acquainted.
-
Flavor Development:
This all happens in the fridge, quietly. The brown sugar slowly dissolves, its caramel notes seeping into the milk. The vanilla infuses the whole jar. It's a slow, gentle process that you don't have to watch over, which I love. It's like the recipe is making itself.
-
Texture Control:
The texture transformation is the real magic. The oats go from dry and flaky to tender and creamy. The chia seeds swell up, creating this lovely, soft thickness. You'll notice the difference between a 6-hour soak and a full overnight soak – the longer it sits, the creamier it gets.
-
Finishing Touches:
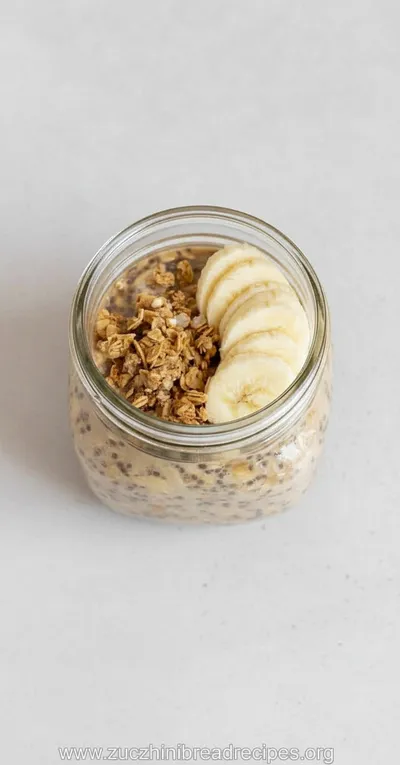
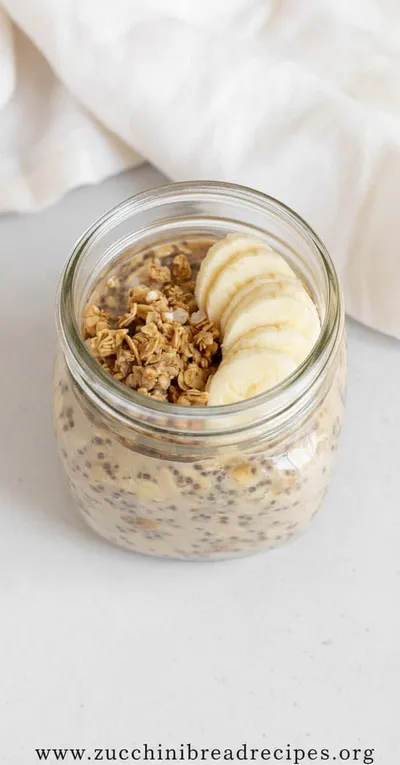
In the morning, you just stir it up. Sometimes a little extra liquid has settled, so a good stir brings it all back together. Then you get to add the fun part: maybe some sliced bananas, a handful of berries, or a sprinkle of cinnamon. It makes it feel special.
-
Serving Timing:
These oats are best enjoyed cold straight from the fridge. They're a refreshing start to the day. You can eat them right away or grab the jar to go. They keep their texture well for a few days, so making a batch on Sunday sets you up for the week.
-
Use a jar with a tight-fitting lid for easy shaking and storage.
-
If it's too thick in the morning, stir in a splash more milk.
-
For extra creaminess, substitute a quarter of the milk with Greek yogurt.
-
Let the oats sit for at least 6 hours, but 8-12 is ideal for the best texture.
Pro Tips
I remember when I first tried this, I was skeptical. Oats, cold? But wow, the texture won me over completely. It’s not mushy like cooked oatmeal can be; it’s more like a creamy, edible pudding. It feels like a small act of kindness you do for your future self. On those rushed mornings, opening the fridge to find breakfast waiting is a genuine relief. It’s one less thing to think about when the day is just starting.
The essence of the dish:
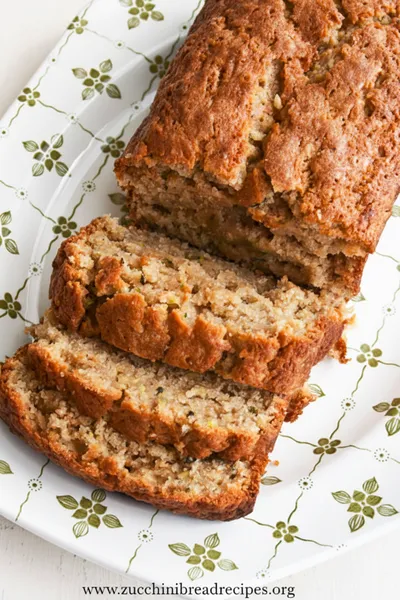
This is about quiet convenience and sweet comfort. It’s the antithesis of a hectic morning. The essence is in the transformation – from simple, separate ingredients into a unified, creamy whole while you’re not even looking. It’s a little like my healthy carrot muffins in that way, a simple batter that bakes into something wonderful, but here, the work is done by time, not heat.
A fun fact or historical angle:
The idea of soaking grains overnight is ancient, a practice used to make them more digestible. Our modern version is a direct descendant of that practical wisdom, just with a sweeter twist.
Flavor or sensory focus:
When you open the jar, you smell the gentle sweetness of brown sugar and vanilla. The first spoonful is cool and creamy, with a satisfying chew from the softened oats. It’s a comforting, gentle way to wake up your senses.
You Must Know
-
The ratio is key: too much liquid=soupy, too little=chalky.
-
Stir well before serving to redistribute the flavors.
-
These are meant to be eaten cold for the best texture.
-
They keep for up to 4 days in the fridge, making them perfect for meal prep.
Frequently Asked Questions
→ Can I use quick oats instead of old-fashioned rolled oats?
I wouldn't recommend it, honestly. Quick oats absorb liquid much faster and can turn the whole thing into a mushy paste. Rolled oats hold their texture beautifully, giving you that perfect creamy-yet-chewy feel.
→ My oats are too thick in the morning. What did I do wrong?
You probably didn't do anything wrong! Oats can vary in how much liquid they absorb. Just stir in an extra tablespoon or two of milk until it reaches your preferred consistency. It's an easy fix.
→ How long do overnight oats last in the refrigerator?
They're best within 3-4 days. After that, the oats can start to break down a bit and lose their ideal texture. It's a great Sunday-prep-for-the-week recipe.
→ Can I heat them up?
You can, but it changes the experience. Warming them will make them more like traditional oatmeal. The charm of this recipe is the cool, refreshing texture, but if you prefer it warm, go for it!
→ What are some good add-in ideas?
Oh, so many! Sliced bananas or berries are classic. A spoonful of nut butter swirled in is delicious. For a crunch, try some chopped walnuts or almonds. It’s a perfect base for creativity, much like adding your own twist to a favorite gluten-free bread.
→ Is this recipe gluten-free?
It can be, as long as you use certified gluten-free oats. Oats are naturally gluten-free, but they are often processed in facilities that handle wheat, so check the package if you have an allergy.
Nutrition Facts
per serving
280
Calories
10g
Protein
45g
Carbs
7g
Fat
Taste Profile
A warm, sweet, and creamy flavor profile with caramel notes from the brown sugar.
Ingredient Substitutions
Don't have an ingredient? Try these alternatives
Use an equal amount. The flavor will be different but still delicious.
The texture and flavor may vary slightly, but the method remains the same.
Recipe Variations
Try these delicious twists on the original
Apple Cinnamon
Add 1/4 cup of unsweetened applesauce and 1/2 tsp cinnamon to the base mixture. Top with diced apple.
Chocolate Peanut Butter
Stir in 1 tbsp cocoa powder and 1 tbsp peanut butter powder with the dry ingredients. Top with chocolate chips.
Common Mistakes to Avoid
Learn from others' mistakes for perfect results
- Using quick oats instead of old-fashioned, resulting in a mushy texture.
- Not shaking or stirring well enough, leading to clumps of undissolved sugar or chia seeds.
- Adding the toppings before refrigerating, which can make them soggy.
Meal Prep & Storage
Make Ahead Tips
This is the ultimate make-ahead recipe! Prepare it up to 4 days in advance for a ready-to-eat breakfast all week.
Leftover Ideas
Leftovers can be stored in the fridge and eaten within 4 days. The texture may continue to soften slightly.
Perfect Pairings
Serve this with...
Cooking Timeline
Combine all base ingredients in a jar and shake well.
Refrigerate for at least 6 hours, ideally 8-12 hours.
Stir, add toppings, and serve cold.
 Healthy
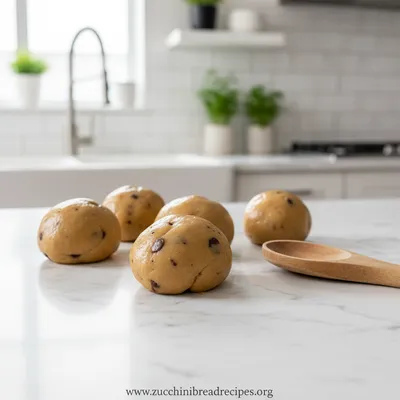
High Protein Cookie Dough
Delicious, chocolatey cookie dough packed with protein for a healthy on‑the‑go treat.
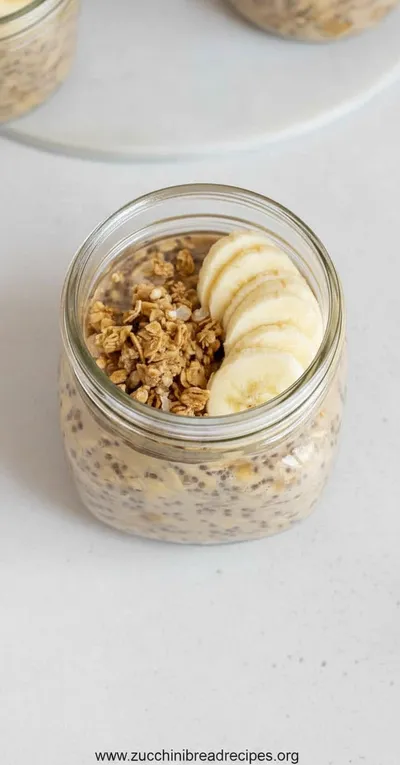
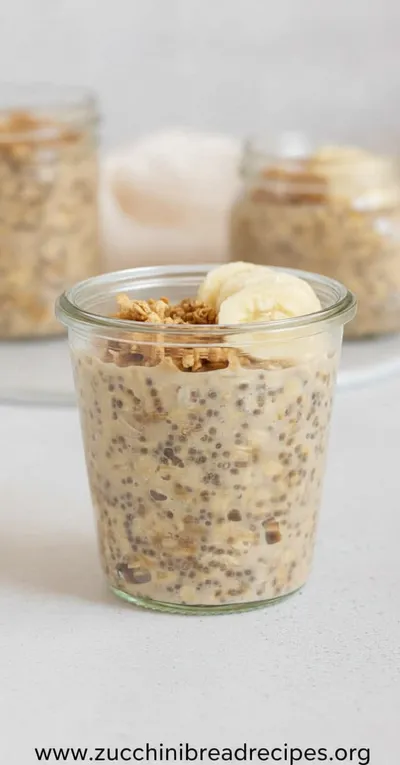
Brown Sugar Overnight Oats Recipe
Wake up to a delicious and creamy breakfast with these easy brown sugar overnight oats, ready when you are.
Timing
Prep Time
5 Minutes
Cook Time
0 Minutes
Total Time
5 Minutes (plus overnight soaking)
Recipe Details
Ingredients
For the Oats
-
01
1 cup old-fashioned rolled oats
-
02
1 1/4 cups milk (dairy or plant-based)
-
03
2 tablespoons brown sugar, packed
-
04
1 tablespoon chia seeds
-
05
1/2 teaspoon vanilla extract
-
06
Pinch of salt
Optional Toppings
-
01
Sliced banana
-
02
Fresh berries
-
03
Chopped nuts (walnuts, almonds)
-
04
A drizzle of maple syrup
-
05
A sprinkle of cinnamon
Instructions
Grab a jar or a container with a lid. A pint-sized mason jar is perfect. Add the rolled oats, brown sugar, chia seeds, and that little pinch of salt.
Pour in the milk and add the vanilla extract. Now, put the lid on tightly and give the jar a really good shake. You want everything to be well mixed. Honestly, sometimes I’ll just stir it with a spoon if I’m using a bowl, but shaking is more fun.
Pop the jar into the refrigerator. Let it sit for at least 6 hours, but overnight is best – 8 to 12 hours gives the oats time to become perfectly soft and creamy.
In the morning, take the jar out. Give the oats a good stir. You might see a little liquid on top or the chia seeds might have settled; stirring brings it all together.
Now for the best part: add your toppings. Slice a banana on top, throw on some berries, or add a crunch with some nuts. Enjoy it cold, right from the jar.
Notes & Tips
-
1
The oats will thicken as they sit. If you prefer a thinner consistency, add more milk when you serve.
-
2
This recipe doubles or triples easily for meal prepping a week's worth of breakfasts.
-
3
For a protein boost, stir in a scoop of vanilla protein powder with the dry ingredients.
 Healthy
Baked Teriyaki Salmon – Easy Healthy Dinner
A quick baked salmon glazed with sweet‑savory teriyaki, perfect for a wholesome dinner.
Tools You'll Need
-
Mason jar or airtight container with lid
-
Measuring cups and spoons
Must-Know Tips
-
Shake it well! This ensures the chia seeds don’t clump and the sugar dissolves.
-
Taste before adding extra sugar. The brown sugar sweetens it nicely, but you can always add more.
-
Let the jar sit flat in the fridge so the liquid distributes evenly.
Professional Secrets
-
Room temperature ingredients aren't necessary here, but using cold milk is fine.
-
No high heat involved – the magic is in the slow soak.
-
No need to deglaze; it's all about gentle incorporation.

Recipe by
Maya Green🌱🥗 Healthy foodie, vegan baker, and smoothie lover. Sharing guilt-free treats with energy and love 💪💚.
Get Delicious Recipes Weekly
Join 25,000+ home cooks getting our best recipes straight to their inbox.
Free forever • No spam • Unsubscribe anytime