
Citrus drying dates back to ancient Mediterranean cultures who used the sun to preserve fruit for winter months. The practice spread along trade routes, becoming a staple for sailors seeking quick energy. Today, the oven offers that same low‑and‑slow magic without waiting for sunshine, giving home cooks a reliable way to capture the bright perfume of oranges year‑round. This method honors that heritage while staying firmly in a modern, health‑focused kitchen.
Why You'll Love It
-
- Naturally sweet with no added sugar
-
- Crunchy texture adds a surprise element
-
- Vibrant color brightens any dish
-
- Simple pantry ingredients
"These dried orange slices are my new pantry hero—perfect for tea and salads!"
Essential Ingredient Guide
- Fresh oranges: Choose firm, brightly colored oranges; their zest holds the most aromatic oils.
- Sea salt: A pinch enhances the natural sweetness and balances the tang.
- Optional honey drizzle: Adds a glossy finish and extra depth, perfect for a dessert garnish.
- Cinnamon or star anise (optional): A tiny sprinkle can introduce a warm spice note during drying.
- Lemon juice (for cleaning): Prevents browning before slicing, keeping the slices bright.
- None needed for sweetener: The orange’s own sugars are enough for a gentle caramelization.
 Healthy
Energy Balls: Healthy Easy Snack Recipe
A calm, no‑bake snack that keeps you energized with wholesome nuts, dates, and a whisper of chocolate.
Complete Cooking Process
-
Ingredient Readiness:
Wash, dry, and slice oranges evenly about ¼‑inch thick; remove seeds.
-
Flavor Development:
A light sprinkle of sea salt and optional spices lifts the citrus aromatics.
-
Texture Control:
Low‑heat baking for 2‑3 hours gently removes moisture while preserving chew.
-
Finishing Touches:
Cool completely before storing; the slices will crisp up further.
-
Serving Timing:
Serve at room temperature as a snack, garnish for salads, or alongside tea.
-
Pat slices dry after lemon rinse to avoid soggy edges
-
Rotate trays halfway for even drying
-
Store in an airtight jar with a paper towel to absorb excess moisture
-
Use a silicone mat for easy release
Pro Tips
These small habits make a big difference. I often line the tray with parchment, then step back and let the oven work its quiet magic. The kitchen fills with a faint, sweet perfume that reminds me of winter mornings when the world smelled of citrus and fresh bread. Let the slices cool completely before sealing; they’ll finish their crisping as they settle in the jar.
The essence of the dish:
The natural sugars of the orange caramelize just enough to give a gentle chew, while the zest lends a bright, aromatic lift.
A fun fact or historical angle:
Ancient Romans dried lemon and orange wedges on rooftops to preserve vitamin C for long voyages.
Flavor or sensory focus:
Expect a fragrant citrus burst on the nose, a slight salty edge, and a satisfying snap when you bite.
You Must Know
-
Slice thickness controls chewiness
-
Low oven temp prevents burning
-
Cool before storing for optimal texture
Frequently Asked Questions
→ Can I use other citrus fruits?
Yes, lemons, limes, and grapefruits work well; adjust drying time for thickness.
→ Do I need to add sugar?
No; the fruit’s natural sugars provide enough sweetness.
→ How long do they keep?
Stored in an airtight container, they stay crisp for up to two weeks.
→ What oven temperature is best?
Set the oven to 140°F (60°C) or the lowest setting; a longer time yields a better texture.
→ Can I make them spicy?
A pinch of cayenne or red pepper flakes before drying adds a subtle heat.
→ Do I need to pre‑heat the oven?
Yes, bring it to temperature so the drying process starts evenly.
Nutrition Facts
per serving
90
Calories
1g
Protein
22g
Carbs
0g
Fat
Taste Profile
Bright, sweet‑tangy with a subtle salty edge
Ingredient Substitutions
Don't have an ingredient? Try these alternatives
Will dry faster due to thinner skin.
Provides a different floral note; use sparingly.
Recipe Variations
Try these delicious twists on the original
Spicy Version
Add a pinch of cayenne pepper before drying for a subtle heat.
Mediterranean Style
Mix dried orange slices with toasted pine nuts and herbs for a salad topping.
Common Mistakes to Avoid
Learn from others' mistakes for perfect results
- Cutting slices too thick; they stay soggy.
- Skipping the rotation; leads to uneven drying.
- Storing before completely cooling; causes soggy texture.
Meal Prep & Storage
Make Ahead Tips
Slice and season the oranges up to 24 hours ahead; keep covered in the fridge before baking.
Leftover Ideas
Re‑crisp in a hot oven for 5 minutes if they lose their snap.
Perfect Pairings
Serve this with...
Cooking Timeline
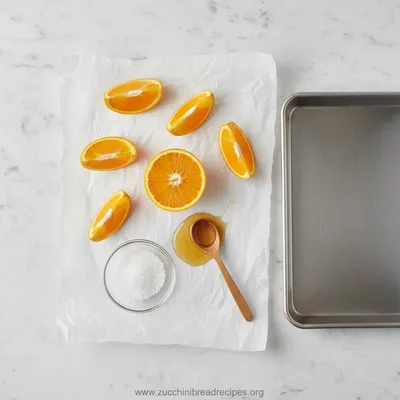
Wash and slice oranges; arrange on sheet.
Season with salt and optional honey; preheat oven.
Bake, turning halfway; monitor for dry touch.
Cool on rack; transfer to storage.
 Healthy
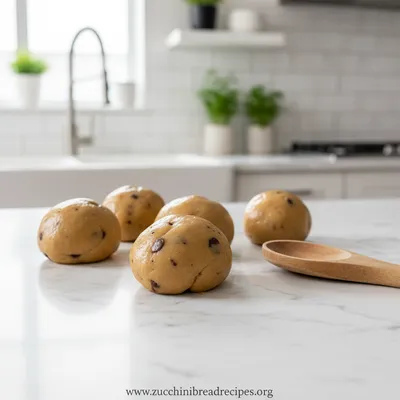
High Protein Cookie Dough
Delicious, chocolatey cookie dough packed with protein for a healthy on‑the‑go treat.
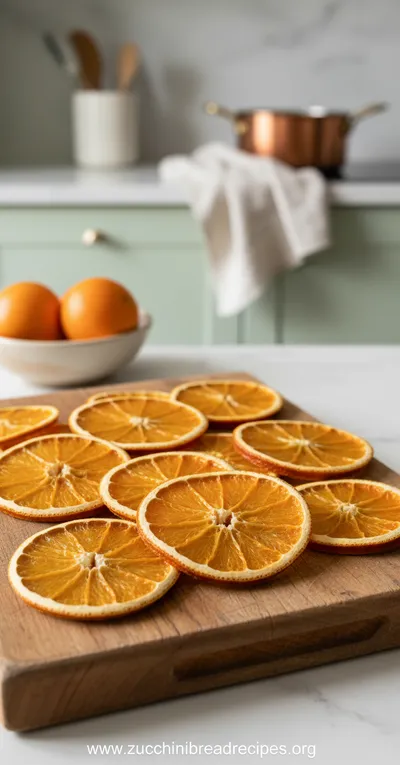
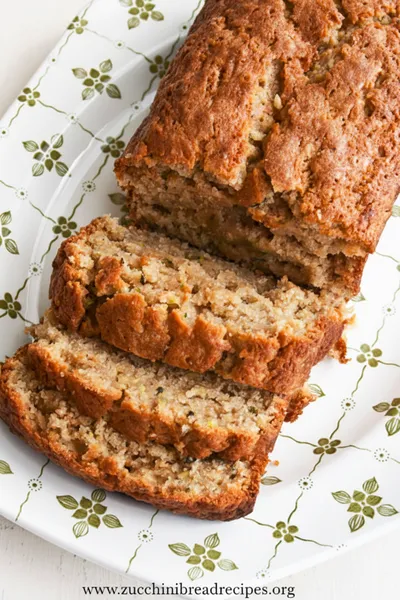
Dried Orange Slices – Oven‑Dried Citrus Snack
Crisp dried orange slices made simply in the oven, offering a sweet‑tangy bite that’s perfect as a snack, garnish, or a fragrant touch to drinks.
Timing
Prep Time
10 Minutes
Cook Time
150 Minutes
Total Time
160 Minutes
Recipe Details
Ingredients
Main Ingredients
-
01
4 large fresh oranges, washed
-
02
1/2 tsp sea salt
-
03
Optional: 1 tsp honey
-
04
Optional: pinch of cinnamon or star anise
Instructions
Preheat the oven to its lowest setting, about 140°F (60°C). Line a baking sheet with parchment.
Slice the oranges into even rounds, about ¼‑inch thick. Remove any seeds.
If you like, brush each slice lightly with honey and sprinkle a pinch of sea salt and optional spice.
Arrange the slices in a single layer on the sheet, leaving a little space between each.
Place in the oven and bake for 2‑3 hours, turning once halfway through, until the slices feel dry to the touch but still slightly pliable.
Remove, let cool on a rack; they will crisp up as they reach room temperature.
Notes & Tips
-
1
If slices are still tacky after cooling, return to the oven for another 10‑15 minutes.
-
2
Store in a glass jar with a paper towel to absorb any remaining moisture.
-
3
For a festive touch, dip the edges in melted dark chocolate after they cool.
 Healthy
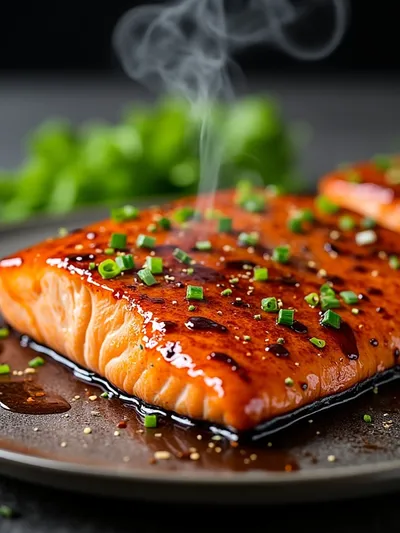
Baked Teriyaki Salmon – Easy Healthy Dinner
A quick baked salmon glazed with sweet‑savory teriyaki, perfect for a wholesome dinner.
Tools You'll Need
-
Sharp knife
-
Cutting board
-
Baking sheet
-
Parchment paper
-
Oven
-
Cooling rack
Must-Know Tips
-
Pat slices dry before seasoning to avoid soggy edges.
-
Rotate trays halfway for even dehydration.
-
Cool completely before sealing to preserve crispness.
Professional Secrets
-
Use a convection oven for more uniform air flow.
-
Add a thin layer of sea salt to balance sweetness.
-
Let the dried slices rest 10 minutes after baking for final texture.

Recipe by
Maya Green🌱🥗 Healthy foodie, vegan baker, and smoothie lover. Sharing guilt-free treats with energy and love 💪💚.
Get Delicious Recipes Weekly
Join 25,000+ home cooks getting our best recipes straight to their inbox.
Free forever • No spam • Unsubscribe anytime