
I remember the first time I tried to bake gluten-free for a friend. It was, honestly, a bit of a disaster. The results were often dry, crumbly, and just… sad. But I was determined. I thought about the texture of my favorite mom's zucchini bread and how the zucchini created such a wonderfully moist crumb. So, I started experimenting, swapping flours, playing with binders, and leaning into the natural moisture of the zucchini. This recipe is the culmination of so many little tweaks and happy accidents in my kitchen. It’s the one that finally made me feel like I’d captured that classic, comforting feeling in a loaf that was both gluten-free and dairy-free. Sharing a slice of this bread feels like sharing a piece of that journey, a small victory that tastes like warmth, care, and a whole lot of love.
Why This Recipe Feels Like a Warm Hug
-
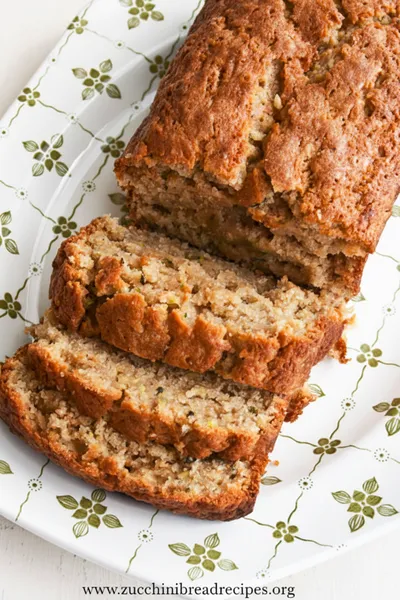
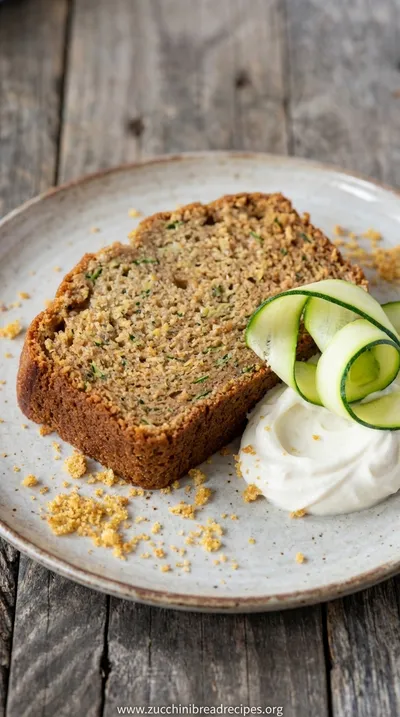
Incredibly Moist & Tender: Seriously, the texture is just dreamy. The combination of shredded zucchini and oil creates a crumb that stays soft and moist for days, something that can be so hard to achieve in gluten-free baking. It's a far cry from the dry, crumbly loaves you might be used to.
-
Beautifully Simple to Make: This is a one-bowl wonder, my friend. You don’t need any fancy equipment, just a bowl and a whisk. It’s the kind of recipe you can turn to on a lazy Sunday morning when you’re craving something homemade but don’t want a mountain of dishes. It’s as easy as the most classic zucchini breads.
-
Naturally Gluten-Free & Dairy-Free: It’s so wonderful to have a recipe that feels inclusive. Whether you’re avoiding gluten and dairy for health reasons or serving guests with sensitivities, this loaf ensures everyone can have a delicious slice. There’s no compromise on flavor or texture, which makes it a true gem.
-
Wonderfully Warm & Spiced: The gentle hum of cinnamon and a tiny whisper of nutmeg make this bread smell absolutely divine as it bakes. It’s a comforting, nostalgic flavor profile that feels perfect for any season, bringing a sense of coziness and warmth to your home. It reminds me of the best zucchini bread from my childhood.
This is, without a doubt, the best gluten-free zucchini bread I have ever made. It’s so moist and flavorful!
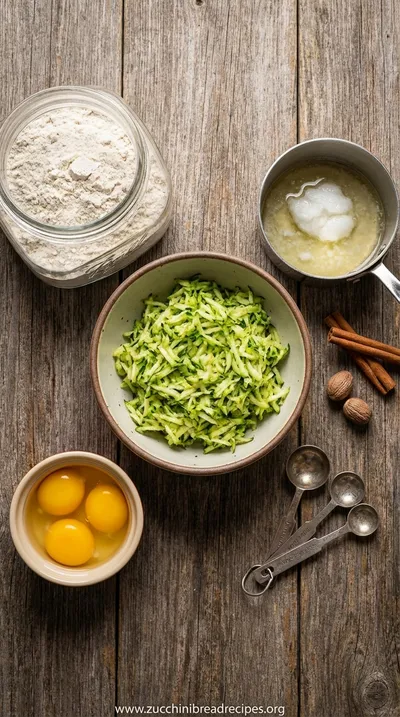
Essential Ingredient Guide
- Gluten-Free All-Purpose Flour: Look, not all gluten-free flours are created equal. For this recipe, I really recommend using a blend that contains xanthan gum. The xanthan gum is what helps mimic the structure and chewiness that gluten typically provides, preventing the bread from being crumbly. I’ve had the best results with Bob's Red Mill 1-to-1 Baking Flour or King Arthur's Measure for Measure. Just be sure to spoon the flour into your measuring cup and level it off; don’t scoop directly from the bag, as that can compact it and make your bread dense.
- Fresh Zucchini: This is our moisture-maker! You'll want about one medium zucchini. The key here is to shred it on the medium holes of a box grater and then gently squeeze out some, but not all, of the excess water. I just use my hands to give it a light squeeze over the sink. If you leave it too wet, the bread can become gummy. If you squeeze it completely dry, you lose that beautiful moisture. It’s a delicate balance, but don't overthink it—a gentle press is perfect.
- Coconut Oil: For the dairy-free aspect, melted coconut oil is just wonderful. It adds a richness and a subtle, almost buttery flavor that is so lovely. You can also use any other neutral-flavored oil like avocado or a light olive oil. Just make sure it’s melted and slightly cooled before you mix it with the eggs, so you don't accidentally scramble them. The oil is crucial for creating that tender, moist crumb that makes this moist zucchini bread so special.
Complete Cooking Process
-
Preparation & Gathering:
First, just breathe. Baking should feel calming. I like to start by preheating my oven to 350°F (175°C) and preparing my loaf pan. A little grease and a dusting of gluten-free flour, or even better, lining it with parchment paper with a little overhang on the sides, makes life so much easier later. Then, I gather all my ingredients. I measure out the dry ones into one bowl, the wet into another. This simple act of organization, mise en place, feels so grounding. It turns the process from a chaotic scramble into a graceful dance. This is when you'll shred your zucchini and give it that gentle squeeze I mentioned.
-
Mixing the Batter:
This is where the magic starts to happen. In a large bowl, whisk together your sugars, melted coconut oil, eggs, and vanilla until they're light and well combined. There’s something so satisfying about watching the mixture turn pale and creamy. Then, you'll gently fold in the dry ingredients. The key word here is gently. Overmixing can make gluten-free baked goods tough. Mix just until you no longer see streaks of flour. Finally, fold in the shredded zucchini. The batter will look thick and wonderfully flecked with green. It’s a beautiful sight.
-
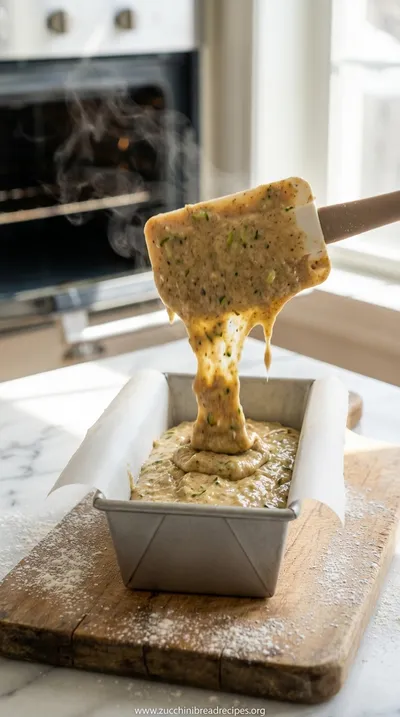
Baking to Golden Perfection:
Now, pour that lovely batter into your prepared pan and smooth the top with a spatula. I sometimes like to sprinkle a little coarse sugar on top for a sparkly, crunchy crust. Pop it into the preheated oven and let it bake. The hardest part is waiting! Around the 50-minute mark, your kitchen will be filled with the most incredible aroma. Check for doneness by inserting a toothpick into the center; if it comes out clean, it’s ready. If it needs a little more time but the top is browning too quickly, you can loosely tent it with a piece of foil. This technique works for almost any quick bread recipe.
-
Let the bread cool in the pan for about 15 minutes before turning it out onto a wire rack. This helps it set up and prevents it from breaking.
-
For the best flavor, let the bread cool completely before slicing. I know, it’s torture! But the flavors meld and the texture settles as it cools.
-
Don't skip the xanthan gum if your flour blend doesn't have it. It's truly essential for the structure of this loaf.
A Few Little Secrets
These little details, honestly, they make all the difference between a good loaf and a great one. It's the care you put in that you can taste in the end.
 Healthy
High Protein Cookie Dough
Delicious, chocolatey cookie dough packed with protein for a healthy on‑the‑go treat.
Frequently Asked Questions
→ Can I use a different type of flour?
While I highly recommend a good 1-to-1 gluten-free all-purpose blend, you could experiment. An almond flour blend would work but might result in a denser, more cake-like texture, which could be lovely! I wouldn't recommend using a single flour like just coconut or almond flour on its own, as the balance is key to achieving the right structure. The goal is to get as close as possible to the texture of a classic loaf, which these blends are designed to do. It’s all about finding that perfect balance for a tender crumb.
→ How do I know when my zucchini bread is perfectly baked?
The toothpick test is your best friend here! When you insert a wooden skewer or toothpick into the center of the loaf, it should come out clean or with a few moist crumbs attached, but no wet batter. The top should be a beautiful golden brown and feel firm to the touch. Sometimes the edges will just start to pull away from the sides of the pan. Trust your senses—the amazing smell is also a pretty good indicator that it’s getting close! If you're exploring other zucchini recipes, this is a great universal tip.
→ Can I make this recipe with less sugar?
Absolutely. Sugar does contribute to moisture and texture, so reducing it can affect the final result slightly. You could probably reduce the total sugar by about 1/4 cup without a major difference. You might also consider swapping some of the granulated sugar for coconut sugar or maple syrup for a different flavor profile. If you're interested in naturally sweetened options, you might enjoy this healthy zucchini bread.
→ Why did my bread turn out gummy?
Gummy texture in gluten-free baking is usually caused by one of two things: too much moisture or under-baking. Be sure you're gently squeezing the excess water from the zucchini before adding it to the batter. Also, ensure your oven is properly preheated and that you bake the loaf until a toothpick comes out completely clean from the center. Letting it cool completely is also crucial, as the starches need time to set. Slicing into it while it's still warm can give it a gummy texture.
→ Can I add nuts or chocolate chips to this recipe?
Oh, please do! This recipe is a wonderful canvas for additions. About 3/4 cup of chopped walnuts or pecans would be delicious, adding a lovely crunch. The same amount of chocolate chips would make it a bit more of a decadent treat. I recommend tossing them in a tablespoon of your gluten-free flour before folding them into the batter; this little trick helps prevent them from sinking to the bottom of the loaf during baking.
→ How should I store this gluten-free zucchini bread?
To keep it wonderfully moist, I recommend storing it in an airtight container at room temperature. It should stay fresh for about 3 to 4 days. Because it’s so moist, storing it in the refrigerator can sometimes dry it out, but if you live in a very humid climate, it might be the best option. You can also freeze it! I like to slice it first, wrap each slice individually, and then place them in a freezer bag. That way, you can just pull out a single slice whenever you need a little treat.
→ Can I make this recipe into muffins?
Yes, it adapts beautifully to muffins! Just divide the batter evenly among a lined 12-cup muffin tin. The baking time will be much shorter, of course. Start checking them around the 18-20 minute mark. They're done when a toothpick inserted into the center comes out clean. It's a great way to have perfectly portioned snacks on hand. For a savory twist, you could even try something like these savory muffins for inspiration.
Nutrition Facts
per serving
195
Calories
2g
Protein
27g
Carbs
9g
Fat
Taste Profile
A comforting, sweet flavor with warm notes of cinnamon and nutmeg and the subtle earthiness of zucchini.
Ingredient Substitutions
Don't have an ingredient? Try these alternatives
Any neutral-flavored oil or melted dairy-free butter alternative will work beautifully here. Just ensure it's melted and slightly cooled before mixing with the eggs.
To make this vegan, you can try using flax eggs. The texture may be a bit denser, but it will still be delicious. Let the flaxseed and water mixture sit for about 5 minutes to thicken before adding it to the batter.
You can substitute the granulated and brown sugar with an equal amount of coconut sugar. If using maple syrup, you may need to reduce the oil slightly to account for the added liquid.
Recipe Variations
Try these delicious twists on the original
Chocolate Chip Zucchini Bread
For a more decadent version, gently fold in 3/4 cup of dairy-free chocolate chips into the batter before baking. The melted chocolate pockets are a delightful surprise.
Lemon Zucchini Bread
Add the zest of one large lemon to the wet ingredients for a bright, citrusy twist. You can also make a simple lemon glaze with powdered sugar and lemon juice to drizzle over the cooled loaf.
Spiced Nut Zucchini Bread
For extra texture and warmth, add 1/2 cup of chopped walnuts or pecans and 1/4 teaspoon of ground ginger to the batter. The crunch of the nuts is a beautiful contrast to the soft bread. If you want a fun alternative you can try this pizza crust too.
Common Mistakes to Avoid
Learn from others' mistakes for perfect results
- Overmixing the batter. With gluten-free flour, overmixing can lead to a tough or gummy texture. Fold the ingredients together just until combined.
- Forgetting to squeeze the zucchini. Too much water in the zucchini will make the center of the bread wet and dense, and it may not cook through properly.
- Slicing the bread while it's still warm. It's so tempting, but gluten-free breads need to cool completely to allow the structure to set. Slicing too early will make it fall apart.
- Using a gluten-free flour blend without a binder. If your blend doesn't contain xanthan gum or another binder, the bread will be very crumbly.
- Not preheating the oven properly. An accurate oven temperature is crucial for the bread to rise correctly and bake evenly all the way through.
Meal Prep & Storage
Make Ahead Tips
This bread is a wonderful candidate for making ahead. You can bake the entire loaf a day or two in advance; in fact, I think the flavor is even better on the second day as the spices have time to meld. Just be sure to store it in an airtight container at room temperature. You can also mix the dry ingredients together and store them in a jar for several weeks. When you’re ready to bake, you just need to add the wet ingredients.
Leftover Ideas
Leftover slices are such a treat. They are perfect for a quick breakfast or snack. If the bread has started to feel a tiny bit dry after a few days, I love to pop a slice in the toaster oven for a minute or two. It warms it up and revives the crumb beautifully. You can also crumble leftover bread and use it as a base for a bread pudding or even toast the crumbles in a pan with a little cinnamon to use as a topping for yogurt or ice cream. Nothing goes to waste!
Perfect Pairings
Serve this with...
Cooking Timeline
Preheat oven and prepare the loaf pan. Whisk together all dry ingredients in one bowl.
Shred and gently squeeze the zucchini. In a separate large bowl, whisk together all wet ingredients.
Combine the dry ingredients with the wet, folding gently. Fold in the shredded zucchini. Pour batter into the prepared pan.
Bake for 50-60 minutes, until a toothpick inserted in the center comes out clean.
Cool in the pan for 15 minutes, then transfer to a wire rack to cool completely before slicing.
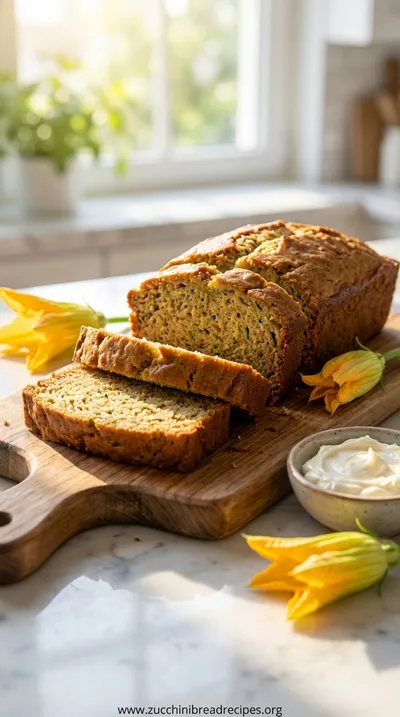
Gluten Free Zucchini Bread Recipe - Dairy Free Option
An easy, moist gluten-free zucchini bread that's also dairy-free. Perfect for a healthy, delicious breakfast or snack.
Timing
Prep Time
20 Minutes
Cook Time
55 Minutes
Total Time
1 Hour 15 Minutes
Recipe Details
Ingredients
Dry Ingredients
-
01
1 1/2 cups (180g) gluten-free all-purpose flour blend (with xanthan gum)
-
02
1/2 cup (100g) granulated sugar
-
03
1/2 cup (100g) packed light brown sugar
-
04
1 teaspoon baking soda
-
05
1/2 teaspoon baking powder
-
06
1 1/2 teaspoons ground cinnamon
-
07
1/4 teaspoon ground nutmeg
-
08
1/2 teaspoon salt
Wet Ingredients
-
01
2 large eggs, at room temperature
-
02
1/2 cup (120ml) melted coconut oil or other neutral oil, slightly cooled
-
03
1 teaspoon vanilla extract
-
04
1 1/2 cups (about 170g) shredded zucchini, lightly squeezed of excess moisture
Instructions
Let’s begin by creating a calm space. Preheat your oven to 350°F (175°C). Take your 9x5 inch loaf pan and gently grease it, then line it with parchment paper, leaving a bit of an overhang on the two long sides. This little trick makes it so much easier to lift the bread out later. In a medium bowl, whisk together your dry ingredients: the gluten-free flour, both sugars, baking soda, baking powder, cinnamon, nutmeg, and salt. Whisking them together now ensures all those lovely spices and leaveners are evenly distributed, so every bite is perfect.
Now for the wet ingredients. In a separate, larger bowl, whisk the room-temperature eggs until they're light and frothy. Slowly stream in the slightly cooled, melted coconut oil while whisking continuously. This helps emulsify them beautifully. Then, add the vanilla extract and give it one last whisk to combine. This simple step of combining the wet ingredients separately helps ensure a smooth, uniform batter without overworking the flour later on.
It's time to bring everything together. Pour the dry ingredients into the bowl with the wet ingredients. Using a spatula, gently fold them together until they are just combined. You might see a few little streaks of flour, and that’s perfectly okay. We don’t want to overmix. Now, add your shredded and lightly squeezed zucchini to the batter. Fold it in gently until it’s evenly distributed throughout. The batter should be thick and lovely.
Carefully pour the batter into your prepared loaf pan, spreading it evenly with your spatula. Pop it onto the middle rack of your preheated oven and bake for 50 to 60 minutes. The time can vary a bit depending on your oven, so start checking it at 50 minutes. When a toothpick inserted into the center comes out clean, it’s done. Let the bread cool in the pan on a wire rack for about 15 minutes before using the parchment handles to lift it out. Allow it to cool completely on the rack before you slice into it. I know, this is the hardest part, but it’s so worth the wait for the perfect texture.
Notes & Tips
-
1
Room Temperature is Key: For the smoothest batter, make sure your eggs are at room temperature. If you forget to take them out ahead of time, oops, it happens! Just place them in a bowl of warm (not hot) water for about 5-10 minutes. This helps the ingredients emulsify much more easily.
-
2
A Note on Zucchini: Don’t peel your zucchini! The skin is soft, full of nutrients, and adds lovely little flecks of color to the bread. Just give it a good wash, trim the ends, and shred away. The size of the shreds from a standard box grater is perfect for this recipe.
-
3
Slicing for Success: A serrated bread knife is your best friend when it comes to slicing this loaf. Since it’s so moist, a regular knife can sometimes squish it. Using a gentle sawing motion will give you beautiful, clean slices every single time. Wait until it is fully, completely cool for the best results.
 Chocolate
Keto Peanut Butter Chocolate Fat Bombs
Low‑carb keto peanut butter chocolate bites that satisfy cravings in seconds.
Tools You'll Need
-
9x5 Inch Loaf Pan: This is the classic home for quick breads. A light-colored metal pan is my go-to as it conducts heat evenly without over-browning the edges. Glass or dark metal pans can bake a little faster, so you might need to check your bread a few minutes earlier.
-
Box Grater: An old-fashioned box grater is honestly the best tool for shredding zucchini for this bread. The medium-sized holes create perfect little ribbons that melt into the batter, providing moisture without being chunky. It’s a simple tool that just works perfectly.
-
Mixing Bowls: I always recommend having a few nesting mixing bowls. For this recipe, you'll need one for the dry ingredients and a larger one for the wet ingredients and final batter. It keeps the process organized and feels so much more peaceful.
-
Wire Cooling Rack: This is a non-negotiable for me. Allowing the bread to cool on a wire rack lets air circulate all around it. This prevents the bottom from getting soggy and ensures the crust stays just right as the loaf cools down completely.
Must-Know Tips
-
Don’t over-squeeze the zucchini. You want to remove the excess pooling water, but not wring it completely dry. That moisture is what makes the bread so tender. A gentle press with your hands is all it needs.
-
Measure your flour correctly. Spoon the gluten-free flour into your measuring cup and level it off with a straight edge. Scooping directly from the bag compacts the flour, and you'll end up with a dry, dense loaf.
-
Let it cool completely. I can't say this enough! Gluten-free baked goods need time to set as they cool. Slicing into a warm loaf will result in a gummy texture. Patience is a virtue, especially with this bread.
Professional Secrets
-
A sprinkle of sugar on top. Before baking, sprinkle a tablespoon of coarse sugar (like turbinado) over the top of the batter. As it bakes, it creates a delicate, crunchy, sparkly crust that adds a wonderful textural contrast.
-
Rest the batter for a moment. After mixing, let the batter rest in the bowl for about 10 minutes before pouring it into the pan. This allows the gluten-free flours to fully hydrate, which can improve the overall texture of the bread.
-
Embrace the blend. While it's tempting to swap sugars or fats, the combination of brown and white sugar provides both moisture and structure, while the oil ensures a tender crumb. This balance is key to mimicking a traditional healthy recipe.

Recipe by
Maya Green🌱🥗 Healthy foodie, vegan baker, and smoothie lover. Sharing guilt-free treats with energy and love 💪💚.
Get Delicious Recipes Weekly
Join 25,000+ home cooks getting our best recipes straight to their inbox.
Free forever • No spam • Unsubscribe anytime