The concept of the no-bake cheesecake is a clever evolution of the traditional German Käsekuchen, which historically relied on heat to set its dense curd. As the mid-century American kitchen evolved, the desire for lighter, 'mousse-like' textures led to the introduction of whipped creams and gelatin-free chilling methods, creating a dessert that felt more like a cloud than a cake.
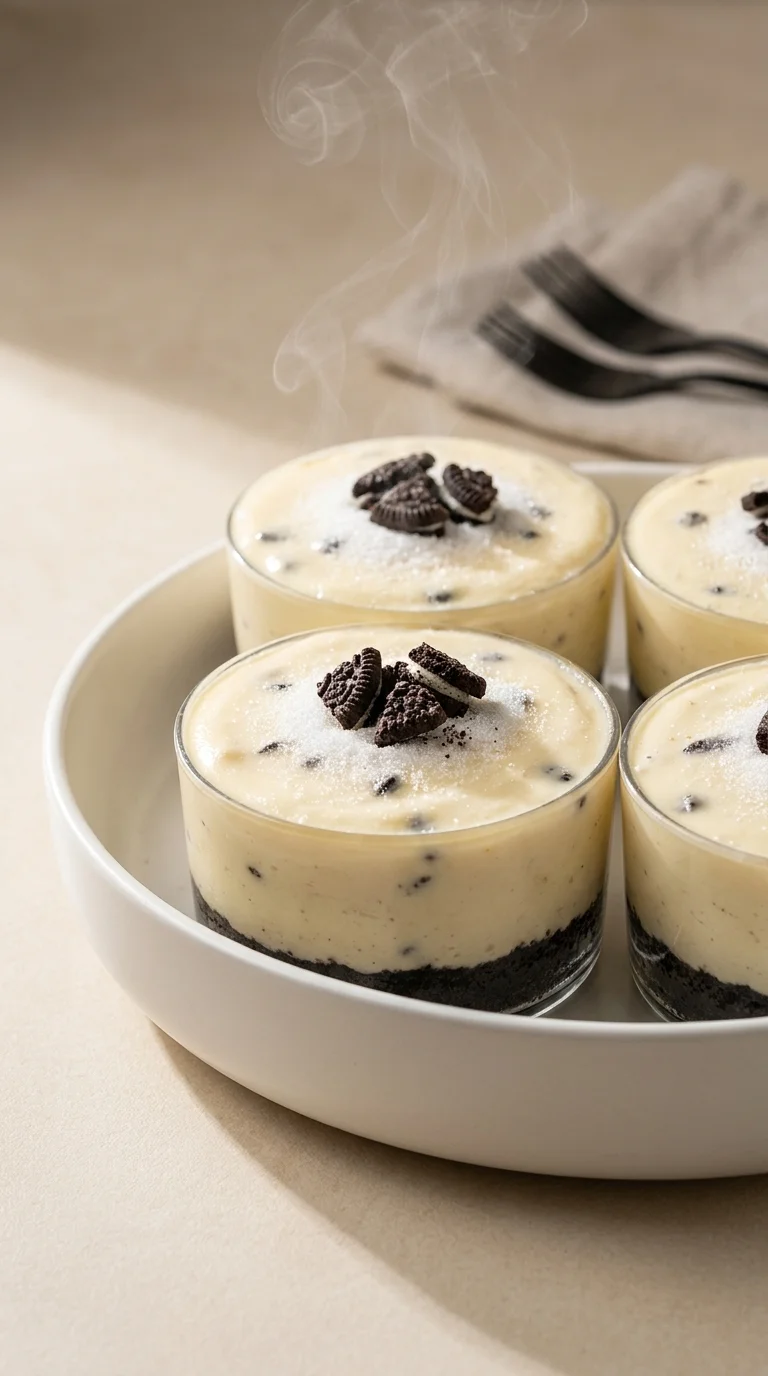
These oreo no-bake cheesecake cups are a modern twist on that tradition, blending the creaminess of a classic cheesecake with the iconic American cookie. The use of a cookie-crumb base as a structural foundation is a technique borrowed from the classic pie culture of the 1950s, designed to provide a textural contrast to the rich filling.
Culturally, the transition to individual servings reflects a shift toward mindful portioning and the aesthetic appeal of "miniature" foods. This format transforms a heavy dessert into an elegant, bite-sized treat, making the rich combination of chocolate and cream feel balanced and approachable for any gathering.
Why You'll Love It
-
- Honestly, there is something so comforting about a treat that doesn't require the oven, and these little cups are just pure bliss.
-
- I love how the crunch of the 1 ½ cups Oreo crumbs balances out that velvety smooth filling, it just feels right in your mouth.
-
- Well, they are perfectly portioned for guests, so you don't have to worry about messy slicing or fighting over the last piece.
-
- It's just such a gentle, chocolatey indulgence that reminds me of those sweet childhood parties, only a bit more refined.
"These are just lovely. The texture is so light, and they've become a favorite at our Sunday brunches!"
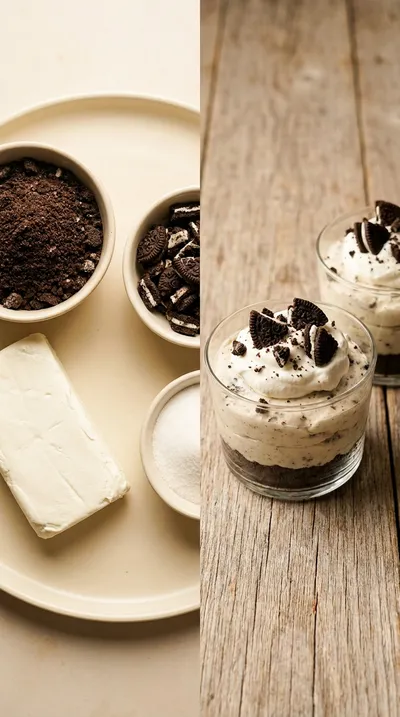
Essential Ingredient Guide
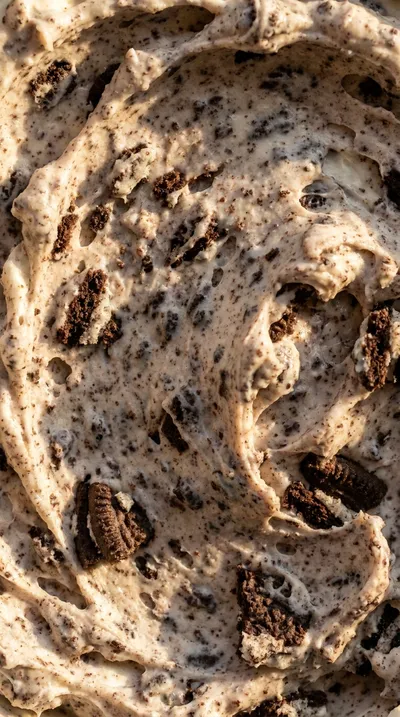
- 8 ounces (226g) cream cheese, softened to room temperature: This is the heart of the recipe. I've learned the hard way that if it isn't truly soft, you'll get little lumps, so just leave it on the counter for a while.
- 8 ounces (226g) heavy whipping cream, cold: Keep this nice and chilly in the fridge until the very last second. It's what gives the cups that airy, cloud-like lift we're after.
- ⅓ cup Oreo pieces, roughly chopped (for garnish, optional): These are just for a little bit of flair at the end. I think it adds a lovely visual touch, but it's really up to you if you want that extra crunch.
- 1 teaspoon vanilla extract: Just a tiny splash, but it rounds out the sweetness so beautifully. It brings a warmth that makes the whole thing taste like home.
- 5 tablespoons (70g) unsalted butter, melted: This binds our crumbs together into a sturdy little base. Make sure it's melted but not boiling hot, or you might lose that nice texture.
- 1 cup (200g) granulated sugar: This provides the sweetness that cuts through the richness of the cheese. It blends right in, leaving the filling smooth and sweet.
 Healthy
Baked Teriyaki Salmon – Easy Healthy Dinner
A quick baked salmon glazed with sweet‑savory teriyaki, perfect for a wholesome dinner.
Complete Cooking Process
-
Getting Ready:
I always start by letting my 8 ounces (226g) cream cheese soften completely. It's a bit of a waiting game, but it makes the mixing process so much smoother, honestly.
-
Building the Flavor:
The magic happens when you beat the sugar into the cheese and stir in that 1 teaspoon vanilla extract. You can smell that sweet, creamy aroma starting to bloom in the bowl.
-
Perfecting the Texture:
The secret is in the fold; gently combining the whipped heavy cream into the cheese mixture keeps it light. If you rush it, you'll lose all those lovely air bubbles, oops.
-
The Final Flourish:
Once they've set, I like to add the ⅓ cup Oreo pieces on top. It's a small detail, but it makes the cups look so inviting and finished.
-
The Patient Wait:
These really need their time in the fridge—at least 4 hours, though I prefer overnight. It ensures every bite is firm yet creamy and perfectly chilled.
-
Make sure your cream cheese is truly softened for the smoothest cheesecake filling.
-
Chill your heavy cream and even your bowl in the freezer for 15 minutes to get those stiff peaks easier.
-
Gently fold the whipped cream in two additions so you don't deflate the mixture.
-
Press the 1 ½ cups Oreo crumbs and melted butter firmly to create a compact crust.
Pro Tips
Just take your time and enjoy the process, you've got this!
 Chocolate
Keto Peanut Butter Chocolate Fat Bombs
Low‑carb keto peanut butter chocolate bites that satisfy cravings in seconds.
Better For You Treats
Ways to Make it Your Own
Serving Suggestions
Frequently Asked Questions
→ Can I make these in advance?
Oh yes, absolutely! In fact, I recommend making them overnight so they have plenty of time to set in the fridge.
→ What if my whipped cream doesn't get stiff?
Don't worry, it happens! Just make sure your 8 ounces (226g) heavy whipping cream is very cold, or try chilling your bowl in the freezer for a bit first.
→ How do I store any leftovers?
Keep them in an airtight container in the fridge, or if you want them for later, you can freeze them for up to a week and thaw them in the fridge before eating.
Nutrition Facts
per serving
420
Calories
6g
Protein
34g
Carbs
28g
Fat
Taste Profile
A rich, creamy balance of sweet cocoa and tangy cream cheese.
Ingredient Substitutions
Don't have an ingredient? Try these alternatives
Works well for a slightly different flavor profile.
Ensure it is sifted to avoid any lumps in the creamy filling.
Use a smaller amount as almond extract is much stronger.
Recipe Variations
Try these delicious twists on the original
Mint Chocolate Oreo Cheesecake Cups
For a refreshing twist, add ½ teaspoon of peppermint extract to the cream cheese mixture and use Mint Oreo cookies for the crust and garnish.
Salted Caramel Oreo Cheesecake Cups
Make these extra decadent by drizzling the finished cheesecake cups with salted caramel sauce and a tiny sprinkle of flaky sea salt.
Common Mistakes to Avoid
Learn from others' mistakes for perfect results
- Using cold cream cheese, which leads to a lumpy filling.
- Overwhipping the cream until it becomes grainy or buttery.
- Stirring too vigorously during the folding process, causing the filling to lose its fluff.
Meal Prep & Storage
Make Ahead Tips
These are actually better if you make them the day before; just let them set in the fridge overnight.
Leftover Ideas
Store any remaining cups in an airtight container in the refrigerator, or freeze them for up to a week and thaw in the fridge.
Perfect Pairings
Serve this with...
Cooking Timeline
Crush Oreos and mix with melted butter for the crust.
Press crust into liners and beat cream cheese with sugar.
Whip the cold heavy cream until stiff peaks form.
Fold cream into cheese, fill the cups, and cover.
Chill in the refrigerator until completely set.
 Chocolate
Creamy Oreo Smoothie
Indulge in a quick, chocolate‑kissed smoothie that’s both creamy and comforting.
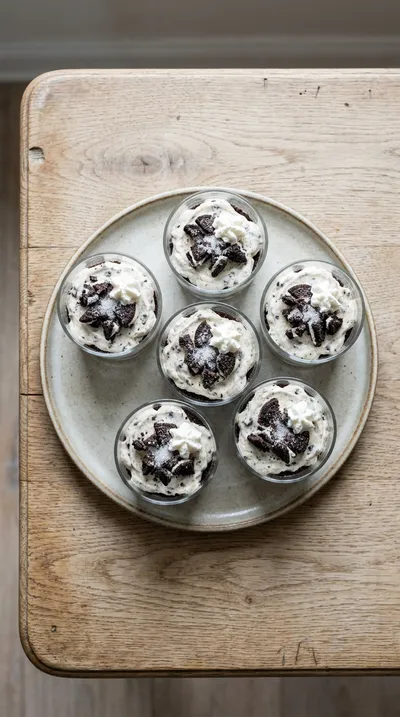
Oreo No-Bake Cheesecake Cups Recipe
Sink your spoon into these velvety, chocolatey oreo no-bake cheesecake cups. The crunch of 1 ½ cups Oreo crumbs meets a cloud-like filling for a dessert that feels like a warm hug in a tiny cup.
Timing
Prep Time
20 Minutes
Cook Time
0 Minutes
Total Time
20 Minutes
Recipe Details
Ingredients
Crust
-
01
1 ½ cups Oreo crumbs (about 36 Oreos, finely crushed)
-
02
5 tablespoons (70g) unsalted butter, melted
Cheesecake Filling
-
01
8 ounces (226g) cream cheese, softened to room temperature
-
02
1 cup (200g) granulated sugar
-
03
1 teaspoon vanilla extract
-
04
8 ounces (226g) heavy whipping cream, cold
Garnish
-
01
⅓ cup Oreo pieces, roughly chopped (for garnish, optional)
Instructions
Let's start with the crust. In a medium bowl, stir together those 1 ½ cups Oreo crumbs and the 5 tablespoons (70g) unsalted butter, melted. Mix it all together until the crumbs are evenly moistened and look like wet sand.
Now, line your 12-cup muffin tin with those cute cupcake liners. Take about 2 tablespoons of that Oreo crumb mixture and press it firmly into the bottom of each liner. You want a nice, compact crust so they hold up well.
In a large bowl, beat the 8 ounces (226g) cream cheese, softened to room temperature, with the 1 cup (200g) granulated sugar. Use your electric mixer until it's smooth and creamy—usually takes about 2-3 minutes. I always make sure to scrape down the sides so everything gets mixed in.
Stir in the 1 teaspoon vanilla extract. Just a quick mix until it's all combined.
In a separate, chilled bowl, whip the 8 ounces (226g) heavy whipping cream, cold, using a clean whisk or mixer until stiff peaks form. Now, be careful here; don't overwhip it or you'll end up with butter, oops!
Gently fold that whipped cream into the cream cheese mixture. Do it in two additions and be very soft with it. We want a light, airy texture, so don't overmix it or you'll deflate all that lovely air.
Spoon the cheesecake filling evenly into your prepared Oreo crusts. Go ahead and fill each liner right to the top.
Cover the muffin tin with plastic wrap and pop it in the refrigerator for at least 4 hours. Honestly, I prefer leaving them overnight so they set completely and feel just right.
Right before you serve them, you can garnish the Oreo no-bake cheesecake cups with the ⅓ cup Oreo pieces, roughly chopped. It adds such a nice little touch.
Notes & Tips
-
1
The cream cheese really needs to be room temperature to avoid lumps.
-
2
Cold heavy cream is a must for those stiff peaks.
-
3
Folding the cream gently preserves the fluffiness of the dessert.
 Quick
Quick
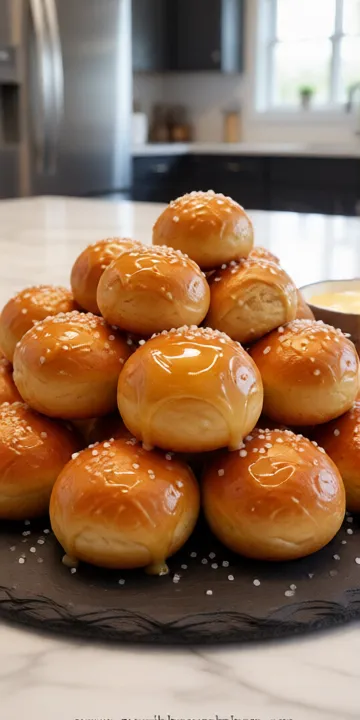
Buttery Soft Pretzel Bites Recipe
Fluffy, buttery pretzel bites that are quick to make and delightful to share.
Tools You'll Need
-
9-inch pie plate or food processor for crushing those Oreos
-
Medium and large mixing bowls
-
Electric mixer, whether you prefer handheld or a stand mixer
-
Rubber spatula for folding
-
12 cupcake liners
-
12-cup muffin tin
Must-Know Tips
-
Room Temp Cheese, Ensure your cream cheese is truly softened by leaving it out for at least an hour for the smoothest filling.
-
Chill Your Equipment, Pop your bowl and beaters in the freezer for 15 minutes to help the heavy cream whip up faster.
-
Gentle Folding, Don't overmix the filling! Fold the whipped cream in gently to keep that airy texture.
Professional Secrets
-
Temperature control is everything; cold cream and warm cheese create the perfect emulsion.
-
The 'two-addition' folding method prevents the heavy cheese from collapsing the light cream.
-
Overnight chilling creates a much more stable and professional consistency than a 4-hour set.

Recipe by
Chloe Bennett🍫💖 Chocolate addict, dessert dreamer, and muffin magician. Sprinkles happiness in every bite 🎉🧁.
Get Delicious Recipes Weekly
Join 25,000+ home cooks getting our best recipes straight to their inbox.
Free forever • No spam • Unsubscribe anytime