
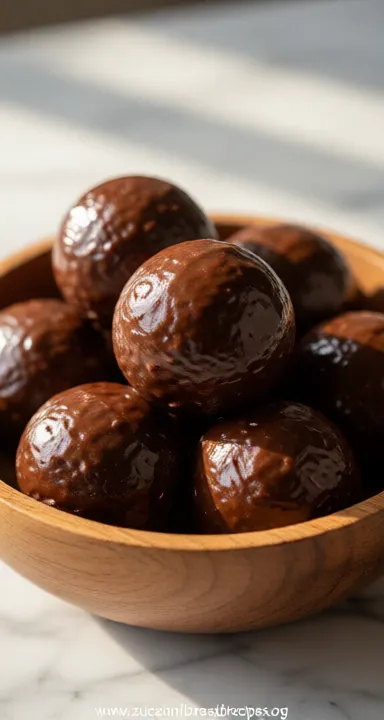
Originating in the United States during the mid‑20th century, Oreo desserts have become a cultural icon, celebrated for their distinctive combination of creamy filling and chocolate wafer. Over time, home cooks have adapted the classic cheesecake into convenient bite‑size portions, embracing no‑bake methods that preserve the delicate texture while simplifying preparation. This modern, health‑focused iteration respects the original’s charm while introducing whole‑grain crusts and reduced‑fat cheese, making it suitable for everyday enjoyment without sacrificing flavor.
Why You'll Love It
-
- No oven needed, so it’s quick and easy
-
- Light oat crust adds gentle sweetness
-
- Reduced‑fat cream cheese keeps it creamy
-
- Perfect for both kids and adults
"These bites are the perfect guilt‑free treat—light, luscious, and instantly satisfying!"
Essential Ingredient Guide
- Oreo‑style cookies (made with oat flour): Provides the familiar chocolate crunch while adding fiber; choose a low‑sugar brand or make your own.
- Reduced‑fat cream cheese: Delivers the rich, tangy base without excess fat; ensure it’s softened for a smooth blend.
- Greek yogurt: Adds protein and a light tang, balancing the sweetness of the filling.
- Vanilla extract: A tiny splash brightens the flavor and ties the chocolate and cream together.
- Lemon juice: A splash of acidity lifts the richness and prevents a heavy mouthfeel.
- Natural sweetener (honey or maple syrup): Adds just enough sweetness to complement the cocoa without overwhelming.
 Healthy
Energy Balls: Healthy Easy Snack Recipe
A calm, no‑bake snack that keeps you energized with wholesome nuts, dates, and a whisper of chocolate.
Complete Cooking Process
-
Ingredient Readiness:
Gather all ingredients, soften the cream cheese, and crush the oat cookies into fine crumbs.
-
Flavor Development:
Blend the cream cheese, yogurt, and sweetener until airy; the mixture will develop a silky smoothness.
-
Texture Control:
Press the crumb mixture firmly into the bite molds, then pipe the filling on top.
-
Finishing Touches:
Dust each bite with a pinch of cocoa powder or a crumble of toasted oats for a subtle crunch.
-
Serving Timing:
Refrigerate for at least two hours; serve chilled for the best texture.
-
Use room‑temperature cream cheese to avoid lumps.
-
Chill the crust before adding filling to keep it firm.
-
Add a dash of espresso powder to intensify chocolate flavor.
-
Store bites in an airtight container to maintain freshness.
Pro Tips
Honestly, these little tricks can make a big difference. When the crust is cold, it holds the filling better, so you don't end up with a soggy base. Also, a tiny hint of espresso wakes up the cocoa without tasting like coffee. So, yes, take a moment to let the bites set fully—patience here rewards you with perfect bite‑size indulgence.

The essence of the dish:
A harmonious blend of light oat crust and a velvety cheese filling, each bite delivering a comforting chocolate whisper.
A fun fact or historical angle:
The original Oreo was introduced in 1912, and the cheesecake adaptation emerged post‑World War II as home bakers sought richer desserts.
Flavor or sensory focus:
You’ll notice a subtle cocoa aroma, a buttery crust, and a creamy, slightly tangy center that melts gently on the tongue.
You Must Know
-
Keep the crust tightly packed.
-
Do not over‑mix the filling.
-
Chill long enough for firm set.
Frequently Asked Questions
→ Can I use gluten‑free cookies?
Yes, substitute the oat‑based cookies with certified gluten‑free chocolate wafers for the same crunch.
→ How long can I store them?
Keep refrigerated in an airtight container for up to three days; they stay fresh and firm.
→ Can I add fruit?
A thin layer of raspberry puree beneath the filling adds a bright contrast without making the crust soggy.
→ Is it suitable for keto?
Swap the oat crumbs for almond flour and use a sugar‑free sweetener to keep carbs low.
→ Do I need special molds?
No, silicone mini‑muffin trays work perfectly and make removal easy.
→ Can I make them ahead of time?
Absolutely—prepare the crust and filling up to 24 hours in advance, then refrigerate until serving.
Nutrition Facts
per serving
120
Calories
4g
Protein
15g
Carbs
5g
Fat
Taste Profile
Chocolate‑kissed, lightly sweet, with a creamy finish
Ingredient Substitutions
Don't have an ingredient? Try these alternatives
Blend tofu longer for a smooth texture; adjust lemon juice slightly.
Provides similar sweetness with a hint of caramel.
Recipe Variations
Try these delicious twists on the original
Spicy Version
Add a pinch of cayenne and a dash of dark chocolate chips for a subtle heat.
Mediterranean Style
Mix a teaspoon of orange zest into the filling and top with toasted pistachios.
Common Mistakes to Avoid
Learn from others' mistakes for perfect results
- Over‑mixing the filling can make it watery.
- Pressing the crust too loosely leads to crumbly bites.
- Not chilling long enough results in a soft, unsteady set.
Meal Prep & Storage
Make Ahead Tips
You can prepare the crust a day ahead and keep it sealed; add the filling just before serving for optimal freshness.
Leftover Ideas
Refrigerate leftovers and enjoy within three days; the texture remains pleasant when kept chilled.
Perfect Pairings
Serve this with...
Cooking Timeline
Gather ingredients, measure oat flour, cocoa, and melt coconut oil.
Combine crust ingredients, press into mini‑muffin tray.
Beat filling components until smooth and airy.
Pipe filling over crust, garnish with crushed cookies.
Refrigerate until firm, then serve chilled.
 Quick
Quick
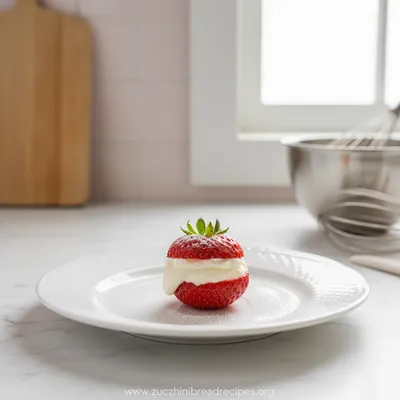
Cheesecake Stuffed Strawberries – Quick Party Snack
Bite‑size strawberries filled with a buttery cheesecake mousse, perfect for quick parties.

Healthy No-Bake Oreo Cheesecake Bites
Enjoy quick, healthy no-bake Oreo cheesecake bites—creamy, chocolatey treats perfect for any occasion. The silky filling meets a light oat crust, delivering comfort without the guilt. For an extra touch, try the cheesecake cups variation that feels just as indulgent.
Timing
Prep Time
15 Minutes
Cook Time
0 Minutes
Total Time
2 Hours
Recipe Details
Ingredients
Crust
-
01
1 1/2 cups oat flour (or finely ground oats)
-
02
1/4 cup cocoa powder
-
03
2 tbsp melted coconut oil
-
04
2 tbsp honey or maple syrup
Filling
-
01
8 oz reduced‑fat cream cheese, softened
-
02
1/2 cup Greek yogurt
-
03
2 tbsp honey
-
04
1 tsp vanilla extract
-
05
1 tbsp lemon juice
-
06
4 Oreo‑style oat cookies, crushed for garnish
Instructions
Combine oat flour, cocoa powder, melted coconut oil, and honey in a bowl; stir until a cohesive crumb forms.
Press the crumb mixture firmly into the bottom of a silicone mini‑muffin tray, creating an even layer.
In a separate bowl, beat together cream cheese, Greek yogurt, honey, vanilla, and lemon juice until smooth and airy.
Spoon the creamy filling over each crust, smoothing the top with the back of a spoon.
Refrigerate for at least two hours; then garnish each bite with a crushed Oreo‑style cookie.
Notes & Tips
-
1
If the crust feels dry, add a splash more melted coconut oil.
-
2
For extra chocolate depth, stir a pinch of espresso powder into the filling.
-
3
Make sure the cream cheese is at room temperature to avoid lumps.
 Healthy
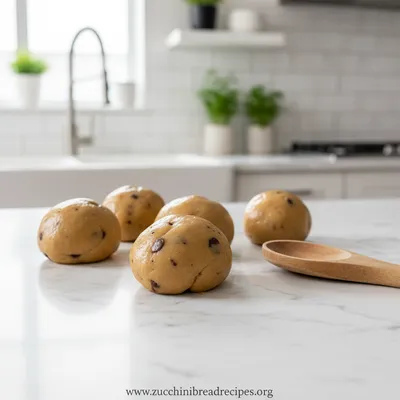
High Protein Cookie Dough
Delicious, chocolatey cookie dough packed with protein for a healthy on‑the‑go treat.
Tools You'll Need
-
Silicone mini‑muffin tray
-
Food processor or zip‑top bag and rolling pin
-
Mixing bowls
-
Hand mixer or whisk
-
Spatula
Must-Know Tips
-
Do not over‑mix the filling; gentle folding keeps it light.
-
Press the crust firmly to prevent cracking later.
-
Taste the filling before chilling; adjust sweetness if needed.
Professional Secrets
-
Room temperature cheese ensures a lump‑free texture.
-
Chill the crust first; it sets faster and holds shape.
-
A quick dash of lemon juice brightens the overall flavor.

Recipe by
Maya Green🌱🥗 Healthy foodie, vegan baker, and smoothie lover. Sharing guilt-free treats with energy and love 💪💚.
Get Delicious Recipes Weekly
Join 25,000+ home cooks getting our best recipes straight to their inbox.
Free forever • No spam • Unsubscribe anytime