
The origins of key lime pie trace back to the Florida Keys, where the tiny, aromatic Key limes grew on the island’s scrubby trees. Over time, bakers turned the simple tart into a beloved dessert, pairing its sharp flavor with a buttery base. This classic treat migrated north, finding a place on family tables across the country. While the story is rooted in regional history, the appeal is universal – a perfect balance of sweet and sour that appeals to every palate.
Why You'll Love It
-
- Bite‑size convenience for parties
-
- Bright lime flavor that awakens the senses
-
- Simple, no‑bake crust for easy prep
-
- Elegant presentation that feels special
These mini pies are a perfect bite of sunshine – my guests keep asking for more!
Essential Ingredient Guide
- Key lime juice: Freshly squeezed juice provides the authentic tang; look for bottled varieties with no added sugar if fresh limes are unavailable.
- Graham cracker crumbs: Choose unsweetened crumbs for better control of sweetness; toast them lightly for extra crunch.
- Sweetened condensed milk: Adds richness and balances the acidity; a small pinch of sea salt can deepen the flavor.
- Butter: Melted butter binds the crust; use unsalted for precise seasoning.
- Lime zest: Finely grated zest lifts the filling with aromatic notes.
- Whipped cream: A dollop on top adds airy contrast and softens the tartness.
Complete Cooking Process
-
Ingredient Readiness:
Measure the crumbs, melt butter, and zest the limes before mixing; this ensures a smooth crust and aromatic filling.
-
Flavor Development:
Combine lime juice with condensed milk and zest, letting the mixture rest for a few minutes so the flavors meld.
-
Texture Control:
Press the crust firmly into mini tart pans; a tight base prevents cracking after chilling.
-
Finishing Touches:
Top each pie with a cloud of whipped cream and a sprinkle of zest just before serving.
-
Serving Timing:
Chill the pies for at least one hour; serve straight from the fridge for the best firm texture.
-
Use a food processor for crumbs – it creates an even texture.
-
Press the crust with the back of a spoon for consistency.
-
Let the filling rest a minute after adding lime juice – it thickens nicely.
-
Garnish with fresh mint leaves for a pop of color.
Pro Tips
Well, those tips can make a big difference, especially when you’re looking for that perfect bite. I remember once forgetting to chill the pies long enough; the filling was a tad runny, but a quick extra half hour in the freezer rescued them. So, patience really pays off. Enjoy the gentle zing and buttery bite each time you serve these mini delights.
 Classic
Orange Juice Cake – Moist, Citrus Delight
A moist orange juice cake that’s light, citrus‑perfumed, and perfect for any gathering.

The essence of the dish:
A buttery, crumbly crust cradles a silky lime custard that’s both tart and sweet, creating a harmonious contrast in each bite.
A fun fact or historical angle:
Key lime pie became popular during the Prohibition era, when bartenders turned to desserts to satisfy cravings for bright flavors.
Flavor or sensory focus:
You’ll notice the first whisper of lime zest, followed by the smooth, creamy body of the filling, and finally the comforting crunch of the crust.
You Must Know
-
Chill the crust before filling
-
Taste the filling before adding extra sugar
-
Use mini tart pans for uniform size
Frequently Asked Questions
→ Can I make the crust ahead of time?
Yes, you can press and bake the crust, then store it in the refrigerator for up to two days before adding the filling.
→ What if I don't have key limes?
Regular limes work fine; just use a bit more juice and zest to achieve the bright flavor.
→ Do I need to bake the pies?
No baking is required; the filling thickens as it chills, making these perfect for hot days.
→ How long can leftovers be stored?
Keep them sealed in the fridge for up to three days; the crust stays crisp if stored with a paper towel layer.
→ Can I add a meringue topping?
Absolutely – a light Swiss meringue adds extra texture, but be sure to torch it quickly to avoid melting the filling.
→ Is this recipe gluten‑free?
Swap the graham crackers for gluten‑free cookies and you have a safe version for those with sensitivities.
Nutrition Facts
per serving
180
Calories
3g
Protein
22g
Carbs
9g
Fat
Taste Profile
A bright, tangy-sweet balance with buttery undertones
Ingredient Substitutions
Don't have an ingredient? Try these alternatives
Use gluten‑free if needed; they provide a similar texture.
Add a tiny splash of orange juice to mimic the unique flavor of key limes.
Recipe Variations
Try these delicious twists on the original
Spicy Version
Add a pinch of cayenne or a few dashes of hot sauce to the filling for a subtle heat.
Coconut Twist
Replace half the graham crumbs with toasted coconut flakes for a tropical flair.
Common Mistakes to Avoid
Learn from others' mistakes for perfect results
- Skipping the cooling step for the crust, leading to a soggy base.
- Over‑mixing the filling, which can cause a grainy texture.
- Using too much lime juice, making the filling overly tart.
Meal Prep & Storage
Make Ahead Tips
You can press and chill the crust up to 24 hours ahead; keep the filling separate until ready to assemble.
Leftover Ideas
Refrigerate leftover pies; gently warm in a low oven for a few minutes if you prefer a softer texture.
Perfect Pairings
Serve this with...
Cooking Timeline
Preheat oven, blend crust ingredients, and press into pans.
Bake crust, then cool on a wire rack.
Whisk filling ingredients until smooth.
Fill crusts, smooth tops, and refrigerate.
Allow pies to set fully before topping and serving.
 Chocolate
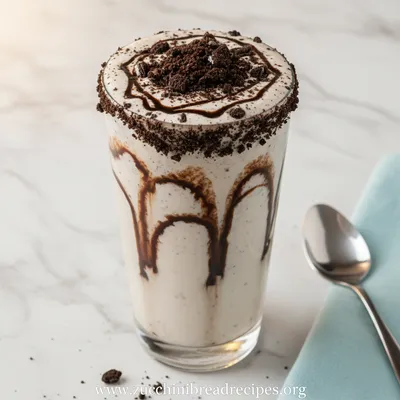
Creamy Oreo Smoothie
Indulge in a quick, chocolate‑kissed smoothie that’s both creamy and comforting.

Mini Key Lime Pies – Refreshing Sweet Dessert
Enjoy bite-sized Mini Key Lime Pies with a buttery graham crust and a tangy, silky lime filling that brightens any gathering. These little delights balance sweet and tart, making them perfect for summer picnics or cosy evenings.
Timing
Prep Time
20 Minutes
Cook Time
0 Minutes
Total Time
1 Hour 20 Minutes
Recipe Details
Ingredients
Crust
-
01
1 1/2 cups graham cracker crumbs
-
02
5 tbsp unsalted butter, melted
-
03
2 tbsp granulated sugar
Filling
-
01
1 cup sweetened condensed milk
-
02
1/2 cup freshly squeezed key lime juice
-
03
1 tsp lime zest
-
04
2 large egg yolks
Topping
-
01
Whipped cream for garnish
-
02
Extra lime zest
Instructions
Preheat oven to 350°F (175°C). In a bowl, combine graham crumbs, melted butter, and sugar; stir until the mixture feels like wet sand.
Press the crumb mixture into the bottoms and up the sides of 12‑piece mini tart pans, creating an even crust. Bake for 5‑7 minutes until lightly golden, then let cool.
While the crust cools, whisk together condensed milk, lime juice, zest, and egg yolks until smooth. The mixture will thicken slightly.
Pour the filling into the cooled crusts, smoothing the tops. Refrigerate for at least 1 hour, or until set.
Before serving, top each mini pie with a dollop of whipped cream and a sprinkle of lime zest. If you like, enjoy them alongside mini cheesecakes for a delightful dessert spread.
For a playful twist, pair these pies with cheesecake stuffed strawberries at your next gathering.
Looking for another bright treat? Try lemon crumb bars – they share the same sunny citrus vibe.
Notes & Tips
-
1
Make sure the lime juice is fresh; bottled juice can be dull.
-
2
Do not over‑mix the filling once the egg yolks are added to avoid curdling.
-
3
If the crust seems dry, add a splash more melted butter.
 Quick
Quick
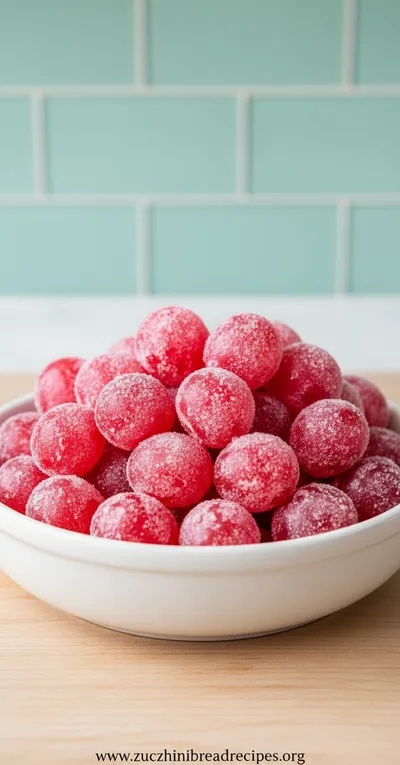
Kool-Aid Grapes Recipe
A quick, colorful snack of grapes soaked in Kool‑Aid for a sweet‑tart bite.
Tools You'll Need
-
Mini tart pans
-
Food processor
-
Mixing bowls
-
Whisk
-
Measuring cups and spoons
-
Spatula
Must-Know Tips
-
Press the crust firmly to avoid cracks during chilling.
-
Taste the filling before chilling; adjust sweetness if needed.
-
Cover the pies with plastic wrap to prevent the crust from absorbing fridge odors.
Professional Secrets
-
Use chilled butter for a crumbly, buttery crust.
-
Let the lime‑condensed milk mixture rest for a minute; it naturally thickens.
-
Cool the crust on a wire rack before filling to keep it crisp.

Recipe by
Emma Harper🥖✨ Lover of timeless recipes, cozy kitchens, and golden loaves. Always baking memories with love ❤️🍽️.
Get Delicious Recipes Weekly
Join 25,000+ home cooks getting our best recipes straight to their inbox.
Free forever • No spam • Unsubscribe anytime