
The origins of the no‑bake cookie trace back to the 1930s when pantry staples like cocoa, sugar, and oats were combined to create a quick dessert during rationing. This classic treat spread across households, offering comfort without the need for an oven, and remains a beloved snack in American kitchens.
Why You'll Love It
-
- No oven needed, ideal for hot summer days
-
- Simple pantry ingredients you likely already have
-
- Chewy texture that stays soft without refrigeration
-
- Versatile base for adding nuts, dried fruit, or chocolate chips
“These cookies are the perfect blend of chew and sweetness—my kids can’t get enough!”
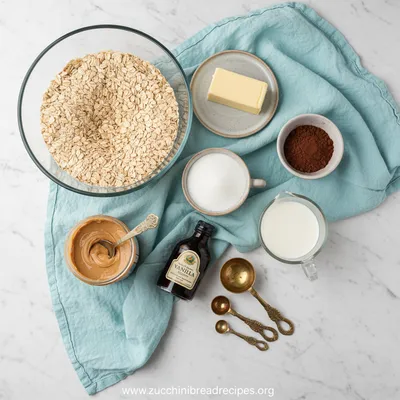
Essential Ingredient Guide
- Rolled oats: Choose thick‑cut oats for the right bite; they hold the cookie together nicely.
- Cocoa powder: Use unsweetened cocoa for deep flavor; sift to avoid lumps.
- Peanut butter: Creamy peanut butter adds richness and helps bind the mixture.
- Brown sugar: Provides caramel sweetness and helps achieve that soft chew.
- Vanilla extract: A splash brightens the chocolate flavor without overpowering.
- Butter: Melted butter gives a glossy finish and a comforting aroma.
 Healthy
High Protein Cookie Dough
Delicious, chocolatey cookie dough packed with protein for a healthy on‑the‑go treat.
Complete Cooking Process
-
Ingredient Readiness:
Measure oats, cocoa, sugar, and butter; have peanut butter and vanilla on hand.
-
Flavor Development:
Melt butter, sugar, and peanut butter together; the mixture darkens slightly, releasing a warm, nutty scent.
-
Texture Control:
Stir in oats and cocoa quickly to coat each piece, preserving a soft interior.
-
Finishing Touches:
Add vanilla, spread onto parchment, and let cool until set.
-
Serving Timing:
Serve after about 15 minutes; the cookies are best enjoyed at room temperature.
-
Use a silicone mat for easy removal.
-
If cookies are too soft, chill briefly to firm up.
-
Add a pinch of salt to balance sweetness.
-
Swirl in mini chocolate chips for extra texture.
Pro Tips
Well, those little tweaks make a difference without turning the recipe into a chore. I remember when I first tried the pinch of salt—it lifted the flavor in a surprisingly gentle way. So, enjoy the process and let the kitchen fill with that familiar, comforting aroma.
The essence of the dish:
These cookies capture the nostalgic sweetness of a 1950s kitchen, with a soft, melt‑in‑your‑mouth texture that comes from the perfect balance of butter, sugar, and oats.
A fun fact or historical angle:
During the Great Depression, no‑bake recipes like this became staples because they required no electricity and used inexpensive pantry items.
Flavor or sensory focus:
You’ll notice the first bite gives a gentle cocoa richness, followed by the buttery chew that lingers sweetly on the palate.
You Must Know
-
Butter should be fully melted before mixing.
-
Do not over‑mix once oats are added.
-
Set the cookies on a cool surface to prevent spreading.
Frequently Asked Questions
→ Can I make these gluten‑free?
Yes, substitute regular oats with certified gluten‑free rolled oats; the texture remains the same.
→ How long do they keep?
Store in an airtight container at room temperature for up to 5 days, or refrigerate for a week.
→ Can I use almond butter instead of peanut butter?
Absolutely—almond butter provides a milder flavor and works just as well for binding.
→ Do I need to chill them?
A brief chill (10‑15 minutes) helps set the cookies if your kitchen is warm, but it’s optional.
→ What can I add for extra texture?
Consider folding in chopped nuts, dried cranberries, or mini chocolate chips after the mixture cools slightly.
→ Can I double the recipe?
Sure—just ensure you have a larger mixing bowl and enough parchment to spread the extra batch.
Nutrition Facts
per serving
230
Calories
5g
Protein
28g
Carbs
11g
Fat
Taste Profile
Rich chocolate with buttery chew
Ingredient Substitutions
Don't have an ingredient? Try these alternatives
Provides a subtle coconut aroma; use the same amount.
Honey adds a lighter sweetness; reduce granulated sugar slightly.
Recipe Variations
Try these delicious twists on the original
Vegan Version
Swap butter for coconut oil and use maple syrup in place of honey for a plant‑based twist.
Gluten‑Free
Replace rolled oats with certified gluten‑free oats or quinoa flakes; texture stays delightfully chewy.
Common Mistakes to Avoid
Learn from others' mistakes for perfect results
- Over‑mixing after adding oats, which can make cookies too soft.
- Adding oats while the mixture is still too hot, leading to soggy texture.
- Skipping the pinch of salt, resulting in a flat sweetness.
Meal Prep & Storage
Make Ahead Tips
You can prepare the mixture and store it in the refrigerator for up to 24 hours; simply scoop and let it sit at room temperature before serving.
Leftover Ideas
Reheat gently in a microwave for 10 seconds if you prefer a softer texture, or enjoy straight from the fridge.
Perfect Pairings
Serve this with...
Cooking Timeline
Gather and measure all ingredients; whisk together sugars and butter in saucepan.
Melt butter, sugars, and peanut butter until smooth; remove from heat.
Stir in cocoa, vanilla, and salt; then quickly fold in oats and optional mix‑ins.
Spoon onto parchment paper, forming cookies; let rest to set.
Allow cookies to cool completely before serving or storing.
 Classic
Orange Juice Cake – Moist, Citrus Delight
A moist orange juice cake that’s light, citrus‑perfumed, and perfect for any gathering.
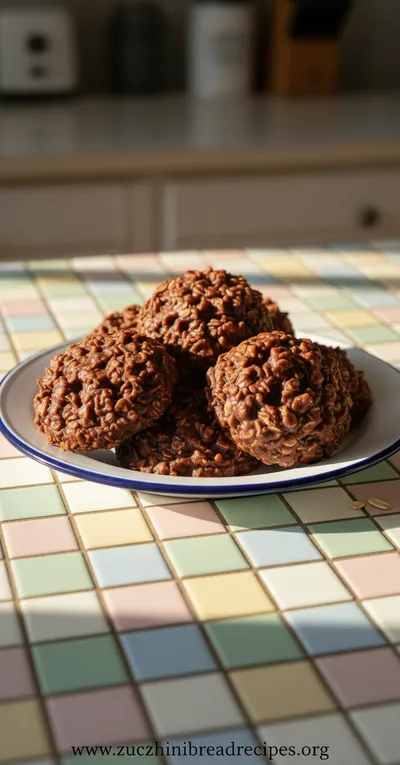
Vintage No-Bake Cookies Recipe
A sweet, chewy Vintage No-Bake Cookies treat that comes together in minutes—no oven needed! Try it alongside oreo balls for a nostalgic snack spread.
Timing
Prep Time
10 Minutes
Cook Time
5 Minutes
Total Time
15 Minutes
Recipe Details
Ingredients
Main Ingredients
-
01
2 cups rolled oats
-
02
1/2 cup unsweetened cocoa powder
-
03
1/2 cup brown sugar
-
04
1/2 cup granulated sugar
-
05
1/2 cup butter, melted
-
06
1/2 cup creamy peanut butter
-
07
1 teaspoon vanilla extract
-
08
Pinch of salt
Optional Mix‑Ins
-
01
1/4 cup mini chocolate chips
-
02
2 tablespoons chopped toasted nuts
-
03
2 tablespoons dried cranberries
Instructions
In a medium saucepan, combine butter, brown sugar, granulated sugar, and peanut butter; melt over medium heat, stirring until smooth.
Remove from heat and stir in cocoa powder, vanilla, and a pinch of salt until fully incorporated.
Add rolled oats (and optional mix‑ins if using) to the chocolate mixture; stir quickly to coat each oat evenly.
Drop spoonfuls onto a parchment‑lined tray, shaping into round cookies about 2 inches in diameter.
Allow cookies to cool at room temperature until set, about 10‑15 minutes, or refrigerate briefly to speed up firming.
Notes & Tips
-
1
Be sure to work quickly once the butter mixture is removed from heat; the oats can soak up moisture fast.
-
2
If the mixture seems too runny, add a tablespoon more oats before shaping.
-
3
For a richer flavor, use dark brown sugar instead of light.
 Healthy
Baked Teriyaki Salmon – Easy Healthy Dinner
A quick baked salmon glazed with sweet‑savory teriyaki, perfect for a wholesome dinner.
Tools You'll Need
-
Medium saucepan
-
Wooden spoon
-
Measuring cups and spoons
-
Mixing bowl
-
Parchment paper
-
Spoon or small cookie scoop
Must-Know Tips
-
Don't overcrowd the tray; give each cookie space to set.
-
Let the butter mixture cool slightly before adding oats to avoid soggy cookies.
-
Taste the mixture before adding oats; adjust sweetness if needed.
Professional Secrets
-
Melt butter and sugars together first; this emulsion creates a glossy finish.
-
Stirring the oats in off‑heat keeps them from becoming too soft.
-
Using a silicone mat helps release the cookies without tearing.

Recipe by
Emma Harper🥖✨ Lover of timeless recipes, cozy kitchens, and golden loaves. Always baking memories with love ❤️🍽️.
Get Delicious Recipes Weekly
Join 25,000+ home cooks getting our best recipes straight to their inbox.
Free forever • No spam • Unsubscribe anytime