
Vanilla ice cream traces its roots to 17th‑century France, where the luxury of imported vanilla beans made it a rare dessert for the aristocracy. Over time, the recipe evolved, becoming a staple in American homes during the 20th century thanks to the invention of electric freezers. Today, the no‑cook method honors that tradition while simplifying the technique for modern kitchens, allowing anyone to experience the timeless flavor without heavy equipment.
Why You'll Love It
-
- No stovetop needed; perfect for hot days
-
- Minimal ingredients, maximum flavor
-
- Quick freezer set‑up, ready in under an hour
-
- Creamy texture without an ice cream maker
"The texture was unbelievably smooth, and the vanilla flavor sang—my family asked for seconds!"
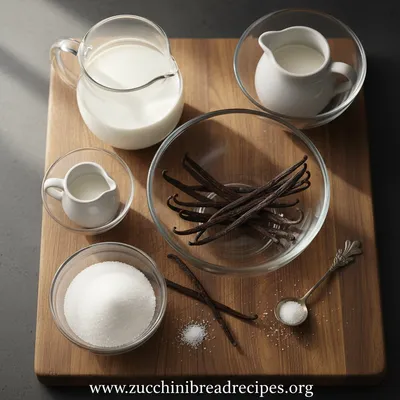
Essential Ingredient Guide
- Heavy cream: Choose a cream with at least 35% fat for a rich, silky base.
- Whole milk: Whole milk balances the richness and helps achieve a smooth consistency.
- Pure vanilla extract: A good-quality extract gives depth; split the beans for extra aroma.
- Granulated sugar: Dissolves easily; you can adjust sweetness to taste.
- Pinch of salt: Enhances the vanilla flavor and rounds out sweetness.
- Optional honey: Adds floral nuance; use sparingly if you like a natural sweetener.
 Classic
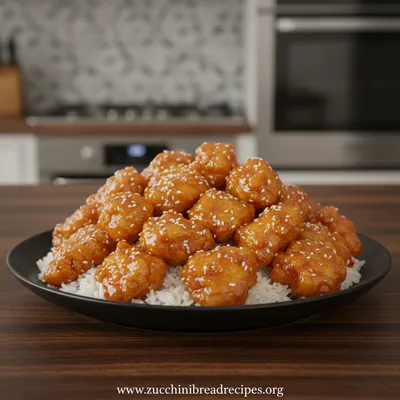
Orange Chicken – Crispy Tangy Sauce
Crispy orange chicken with a glossy, sweet‑tangy sauce—quick, satisfying, and classic.
Complete Cooking Process
-
Ingredient Readiness:
Measure and chill all liquids beforehand; this speeds up the freezing process.
-
Flavor Development:
Blend vanilla extract with the sugar so it fully dissolves before chilling.
-
Texture Control:
Stir the mixture every 30 minutes while it freezes to break up ice crystals.
-
Finishing Touches:
After the final stir, let the ice cream sit a few minutes to settle before serving.
-
Serving Timing:
Serve within 24 hours for optimal creaminess; later it may become firmer.
-
Use a shallow metal pan for faster, even freezing.
-
Cover the surface with parchment paper to prevent ice crystals.
-
Freeze a metal spoon and dip it into the mixture for smoother stirring.
-
If the ice cream is too hard, let it soften at room temperature for 5 minutes before scooping.
Pro Tips
These small adjustments can turn a simple no‑cook vanilla ice cream into a truly luxurious treat. The key is patience and gentle handling; each stir invites the flavors to meld, creating that nostalgic, melt‑in‑your‑mouth sensation that makes vanilla timeless. So set a timer, breathe in the vanilla scent, and enjoy the quiet rhythm of the freezer doing its work.
 Classic
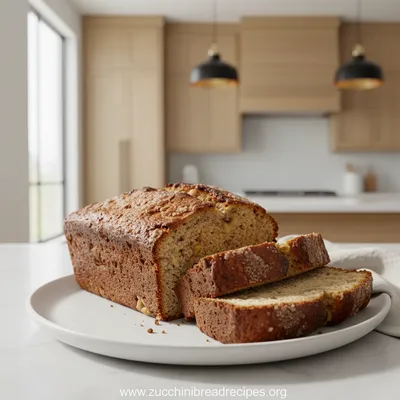
Best Banana Bread Recipe
Soft, sweet banana bread made with ripe bananas, a touch of butter, and simple pantry staples.
The essence of the dish:
The magic lies in a balance of dairy richness and pure vanilla aroma, delivering a smooth, velvety bite that feels like a cool whisper on a warm day.
A fun fact or historical angle:
When cottage cheese ice cream first became popular, home cooks loved the simplicity of frozen desserts without churners.
Flavor or sensory focus:
Expect the first spoonful to release sweet, buttery vanilla notes, followed by a luxuriously creamy texture that coats the palate gently.
You Must Know
-
Use cold ingredients to speed up freezing
-
Stir regularly to avoid icy crystals
-
Store in an airtight container for best texture
Frequently Asked Questions
→ Can I use low‑fat milk?
Yes, but the ice cream will be less rich and may develop a grainier texture.
→ Do I need an ice cream maker?
No, this recipe is designed for a simple freezer and occasional stirring.
→ How long does it take to freeze?
About 45‑60 minutes with regular stirring every 30 minutes.
→ Can I add mix‑ins like chocolate chips?
Fold them in during the final stir so they stay evenly distributed.
→ Is it safe to leave the mixture out while I stir?
A few minutes at room temperature is fine; keep it under 10 minutes total.
→ What if I want a dairy‑free version?
Replace the cream and milk with coconut cream and almond milk; adjust sweetness as needed.
Nutrition Facts
per serving
280
Calories
3g
Protein
22g
Carbs
20g
Fat
Taste Profile
Smooth, buttery vanilla with balanced sweetness
Ingredient Substitutions
Don't have an ingredient? Try these alternatives
Provides a dairy‑free richness; may add a subtle coconut flavor.
Use ¼ cup maple syrup; reduces graininess but adds depth.
Recipe Variations
Try these delicious twists on the original
Spicy Version
Add a pinch of ground cinnamon and a dash of cayenne for a warm kick.
Mediterranean Style
Stir in toasted almond slivers and a drizzle of honey after the final freeze.
Common Mistakes to Avoid
Learn from others' mistakes for perfect results
- Skipping the periodic stirring, which creates icy texture.
- Using low‑fat dairy, resulting in a watery final product.
- Leaving the mixture uncovered, causing freezer burn.
Meal Prep & Storage
Make Ahead Tips
You can whisk the base mixture and store it covered in the refrigerator for up to 24 hours before freezing.
Leftover Ideas
Transfer leftovers to a shallow container; let sit at room temperature 5 minutes before scooping.
Perfect Pairings
Serve this with...
Cooking Timeline
Prepare and whisk all ingredients together.
Place mixture in freezer; start first stir after 30 minutes.
Stir every 20‑30 minutes to break up ice crystals.
Final stir and transfer to container for a firmer finish.

Homemade Vanilla Ice Cream – No‑Cook Recipe
Enjoy creamy homemade vanilla ice cream without heating—simple, quick, and perfect for any season.
Timing
Prep Time
10 Minutes
Cook Time
0 Minutes
Total Time
55 Minutes
Recipe Details
Ingredients
Base
-
01
2 cups heavy cream
-
02
1 cup whole milk
-
03
½ cup granulated sugar
-
04
2 tsp pure vanilla extract
-
05
Pinch of salt
Optional Add‑ins
-
01
1 tbsp honey (optional)
-
02
Fresh berries for garnish
Instructions
In a large bowl, whisk together the milk, sugar, and pinch of salt until the sugar dissolves.
Add the heavy cream and vanilla extract, whisking gently until fully combined.
Cover the bowl with plastic wrap and place it in the freezer for 30 minutes.
After 30 minutes, remove and stir vigorously with a fork or whisk, breaking up any forming ice crystals.
Return to the freezer and repeat the stirring every 20‑30 minutes for the next 30 minutes, until the mixture is thick and creamy.
Once the ice cream reaches a soft‑serve consistency, transfer it to an airtight container, smooth the top, and freeze for an additional 15 minutes for a firmer texture.
Scoop into bowls, garnish with fresh berries or a drizzle of honey, and enjoy.
Notes & Tips
-
1
For the smoothest texture, chill the mixing bowl beforehand.
-
2
If the mixture freezes too hard, let it sit at room temperature for a few minutes before scooping.
-
3
You can experiment with a splash of vanilla overnight oats for extra creaminess.
Tools You'll Need
-
Large mixing bowl
-
Whisk or fork
-
Plastic wrap
-
Freezer‑safe container
-
Spatula
Must-Know Tips
-
Don’t skip the stirring steps; they keep ice crystals small.
-
Keep the lid slightly ajar the first time to allow steam to escape.
-
Taste before the final freeze; adjust sweetness if needed.
Professional Secrets
-
Use a metal pan; it conducts cold faster.
-
Cover the surface with parchment to prevent ice crystals.
-
Stir with a cold spoon for smoother texture.

Recipe by
Emma Harper🥖✨ Lover of timeless recipes, cozy kitchens, and golden loaves. Always baking memories with love ❤️🍽️.
Get Delicious Recipes Weekly
Join 25,000+ home cooks getting our best recipes straight to their inbox.
Free forever • No spam • Unsubscribe anytime