
Originating from the classic New York cheesecake tradition, the miniature version became popular in the 1990s as a party-friendly bite. The concept blends a buttery graham crust with a silk‑smooth cheese filling, scaled down for easy serving. It reflects a timeless love for dairy‑rich desserts while fitting modern portion‑control trends.
Why You'll Love It
-
- They look adorable and taste divine
-
- Easy to make ahead and store
-
- Perfect for both casual snacks and special celebrations
-
- Versatile: you can add fruit, chocolate, or nuts
"These mini cheesecakes are the perfect sweet spot—tiny, creamy, and just right for my tea time."
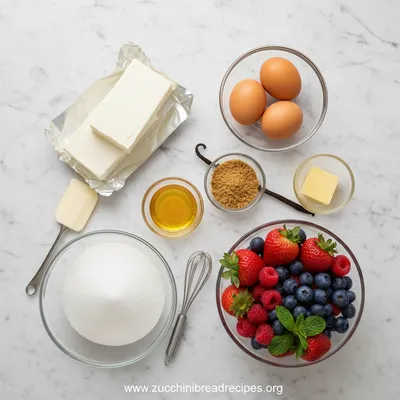
Essential Ingredient Guide
- Cream cheese: Choose full‑fat for richness; let it soften to avoid lumps
- Graham crackers: Crush finely; a touch of melted butter helps bind the crust
- Sugar: Granulated works best; you can swap half for honey for a subtle caramel note
- Vanilla extract: A splash adds depth without overwhelming the cheese
- Lemon zest: Brightens the flavor and balances the sweetness
- Heavy cream: Adds silkiness; you can substitute half with Greek yogurt for a lighter texture
 Healthy
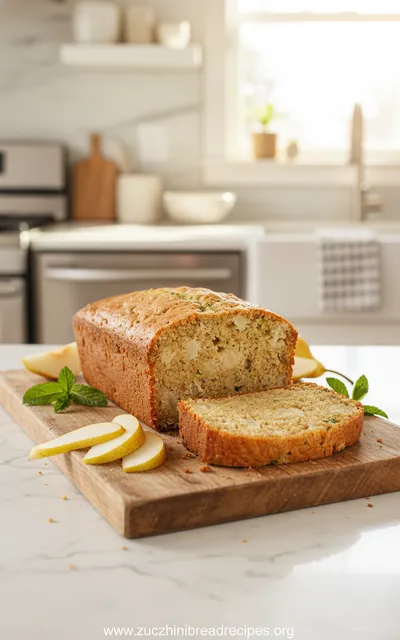
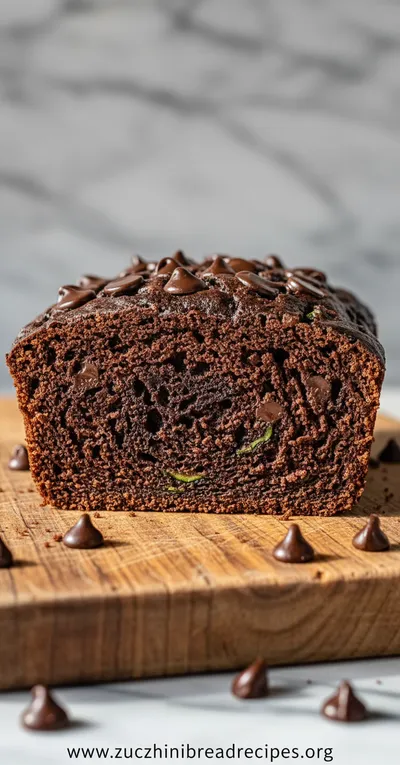
Pear Zucchini Bread Recipe
A moist and flavorful quick bread combining fresh pear and zucchini.
Complete Cooking Process
-
Ingredient Readiness:
Soften the cream cheese, grate the lemon zest, and crush the crackers; this ensures a smooth batter and an even crust.
-
Flavor Development:
Blend cream cheese with sugar and vanilla; the mixture becomes airy after a gentle whisk, inviting a light mouthfeel.
-
Texture Control:
Press the crust firmly into the liners; this prevents cracking when the filling sets.
-
Finishing Touches:
Top each mini with a dusting of cocoa or a fresh berry; the contrast adds visual appeal.
-
Serving Timing:
Chill for at least two hours; the coolness lets the flavors meld and the texture firm up.
-
Avoid over‑mixing; it can introduce air bubbles that cause cracks
-
Tap the pan gently after filling to release trapped air
-
Use a water bath for an even bake and silky center
-
Run a hot, damp knife around the edge before chilling for a cleaner release
Pro Tips
Well, these small adjustments make a world of difference. When I let the cheesecake settle in the fridge, I notice a subtle bloom of aroma that makes the waiting worthwhile. So, take your time, and enjoy the gentle anticipation.
 Classic
Orange Chicken – Crispy Tangy Sauce
Crispy orange chicken with a glossy, sweet‑tangy sauce—quick, satisfying, and classic.
The essence of the dish:
A buttery graham crust cradles a velvety cheese filling, finished with a whisper of lemon zest. The bite‑size format lets you savor each texture without feeling overwhelmed.
A fun fact or historical angle:
Mini cheesecakes were originally served at cocktail parties in the early 20th century, offering a refined sweet that could be eaten in one elegant mouthful.
Flavor or sensory focus:
When you bite in, you first feel the gentle crunch of the crust, then the creamy, slightly tangy interior, and finally a faint citrus perfume that lingers.
You Must Know
-
Chill the crust before adding filling to avoid sogginess
-
Room temperature cheese mixes smoother
-
Do not over‑bake; the center should just barely wobble
Frequently Asked Questions
→ Can I make these ahead of time?
Yes, store them sealed in the fridge for up to three days; they stay creamy and firm.
→ What if I don’t have a water bath?
You can bake them directly in the oven; just keep an eye on the edges and lower the temperature by 10 °F.
→ How do I prevent cracks on the surface?
Avoid over‑mixing and don’t over‑bake; a slight wobble is key.
→ Can I freeze the mini cheesecakes?
Freeze them for up to a month; thaw in the refrigerator before serving.
→ What toppings work best?
Fresh berries, a drizzle of chocolate, or a crumble of toasted nuts all complement the flavor.
→ Is there a dairy‑free version?
Swap cream cheese for a firm vegan cream cheese and use coconut cream in place of heavy cream.
Nutrition Facts
per serving
210
Calories
5g
Protein
18g
Carbs
13g
Fat
Taste Profile
Rich, creamy, and gently sweet with a hint of citrus
Ingredient Substitutions
Don't have an ingredient? Try these alternatives
Choose a brand that melts well; the texture will be slightly lighter.
Ensure they are finely crushed for a cohesive crust.
Recipe Variations
Try these delicious twists on the original
Spicy Version
Add a pinch of cayenne and a swirl of caramel for heat and sweetness.
Mediterranean Style
Mix in a teaspoon of honey and top with crushed pistachios and orange zest.
Common Mistakes to Avoid
Learn from others' mistakes for perfect results
- Over‑mixing the batter, which can cause cracks
- Baking too long, leading to a dry interior
- Skipping the cooling step, resulting in a gummy texture
Meal Prep & Storage
Make Ahead Tips
You can bake the mini cheesecakes a day ahead, then chill. Add fresh toppings just before serving for maximum freshness.
Leftover Ideas
Reheat gently in a microwave for 10 seconds if you prefer them warm, or enjoy cold straight from the fridge.
Perfect Pairings
Serve this with...
Cooking Timeline
Preheat oven, crush crackers, melt butter, press crust into ramekins.
Blend cream cheese, sugar, vanilla, lemon zest; incorporate eggs and cream.
Bake mini cheesecakes until edges set and center slightly jiggles.
Cool to room temperature, then chill in refrigerator.
Add toppings and serve.
 Classic
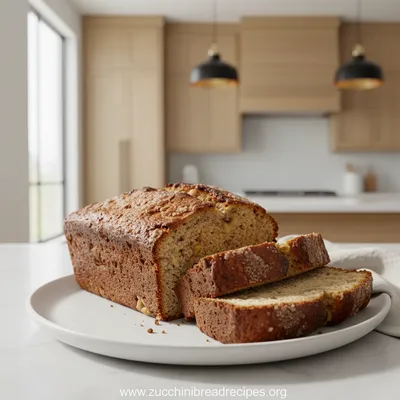
Best Banana Bread Recipe
Soft, sweet banana bread made with ripe bananas, a touch of butter, and simple pantry staples.
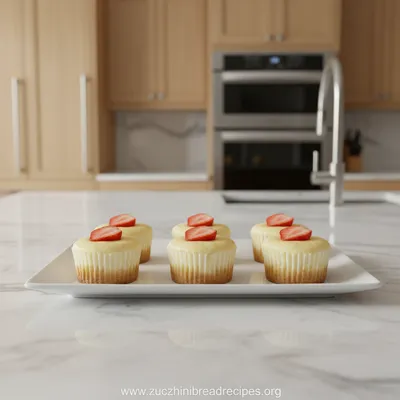
Mini Cheesecakes Recipe
Bite‑sized mini cheesecakes that melt on the tongue, rich and creamy, perfect for gatherings. For a protein twist try the protein mini version, or pair them with a fresh fruit note like strawberry oats.
Timing
Prep Time
15 Minutes
Cook Time
25 Minutes
Total Time
40 Minutes
Recipe Details
Ingredients
Crust
-
01
1½ cups graham cracker crumbs
-
02
3 tbsp melted butter
-
03
2 tbsp sugar
Filling
-
01
16 oz (450 g) full‑fat cream cheese, softened
-
02
½ cup sugar
-
03
2 large eggs
-
04
¼ cup heavy cream
-
05
1 tsp vanilla extract
-
06
1 tsp lemon zest
Topping
-
01
Fresh berries or sliced fruit
-
02
Optional: melted chocolate drizzle
Instructions
Preheat oven to 325°F (160°C). Mix crumbs, melted butter, and sugar; press into the bottoms of 12‑cup ramekins.
In a bowl, whisk softened cream cheese until smooth, then add sugar, vanilla, and lemon zest.
Beat in eggs one at a time, followed by heavy cream, mixing just until combined.
Pour the filling over the crusts, place the ramekins on a baking sheet, and bake for 20‑25 minutes until the edges are set and the center barely jiggles.
Cool to room temperature, then chill for at least two hours. Top with berries or a chocolate drizzle before serving.
Notes & Tips
-
1
If the crust looks dry, add a splash more melted butter before pressing.
-
2
Leave a tiny gap at the top of each ramekin to prevent overflow.
-
3
For a chocolate twist, fold in 2 tbsp cocoa powder into the filling.
Tools You'll Need
-
12‑cup ramekin set
-
Mixing bowls
-
Hand mixer or whisk
-
Measuring cups and spoons
-
Baking sheet
Must-Know Tips
-
Don’t over‑mix the batter; it can incorporate excess air causing cracks.
-
Let the cheesecake sit at room temperature before chilling; this helps prevent a cracked surface.
-
Taste the filling before baking; adjust sweetness or lemon to your preference.
Professional Secrets
-
Room temperature cream cheese ensures a velvety batter.
-
A water bath creates gentle, even heat for a silky texture.
-
Cooling slowly in the oven with the door ajar prevents sudden temperature changes.

Recipe by
Emma Harper🥖✨ Lover of timeless recipes, cozy kitchens, and golden loaves. Always baking memories with love ❤️🍽️.
Get Delicious Recipes Weekly
Join 25,000+ home cooks getting our best recipes straight to their inbox.
Free forever • No spam • Unsubscribe anytime