
Originating from a tradition of quick desserts before modern appliances, this no‑cook ice cream reflects a time when households relied on pantry staples and simple methods to create frozen delights. Its roots lie in early 20th‑century home kitchens where improvisation turned everyday ingredients into beloved treats.
Why You'll Love It
-
- No ice‑cream maker needed, just a freezer
-
- Minimal ingredients, pure flavors shine
-
- Ready in under 30 minutes, perfect for spontaneous cravings
-
- Gentle on the stomach, dairy‑free and light
"I made this for my kids, and they asked for seconds—no churn, no mess!"
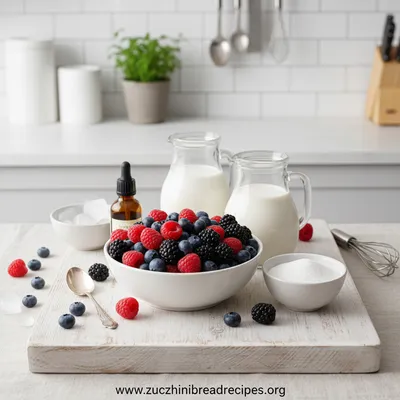
Essential Ingredient Guide
- Full‑fat coconut milk: Provides rich creaminess; choose a can without additives for the smoothest texture
- Pure maple syrup or honey: Sweetens naturally; adjust amount to taste, a tablespoon adds gentle sweetness
- Vanilla bean or extract: Adds aromatic depth; split a bean for specks or use a teaspoon of extract
- Sea salt: A pinch balances the sweetness and enhances flavor
- Fresh fruit or cocoa nibs (optional): Stir in at the end for texture and visual appeal
- Ice cubes (for quick chill): Optional, helps lower temperature faster before freezing
 Classic
Orange Juice Cake – Moist, Citrus Delight
A moist orange juice cake that’s light, citrus‑perfumed, and perfect for any gathering.
Complete Cooking Process
-
Ingredient Readiness:
Measure and whisk coconut milk with sweetener and vanilla until smooth; chill the bowl slightly before pouring.
-
Flavor Development:
Allow the mixture to sit for a few minutes; the vanilla infuses gently, creating a fragrant base.
-
Texture Control:
Place the bowl in the freezer, stirring every 5‑7 minutes to break ice crystals and keep it creamy.
-
Finishing Touches:
When the ice cream reaches a soft‑serve consistency, fold in optional fruit or cocoa nibs.
-
Serving Timing:
Let it sit a minute at room temperature before scooping for perfect curves.
-
Use a metal bowl; it freezes faster
-
Stir with a wooden spoon for gentle aeration
-
Cover tightly to prevent freezer burn
-
Add a splash of almond milk for extra silkiness
Pro Tips
I often find that letting the bowl sit on the counter for just a moment before the first stir helps the mixture loosen a little, making each subsequent stir smoother. It's those tiny pauses that turn a simple dessert into a calm ritual, you know?
 Chocolate
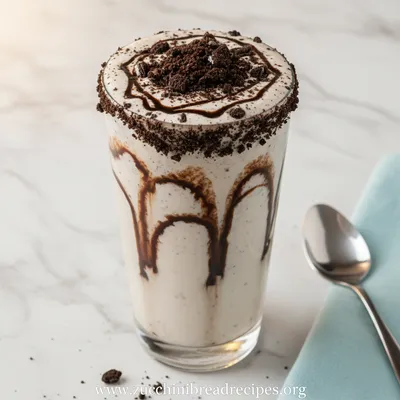
Creamy Oreo Smoothie
Indulge in a quick, chocolate‑kissed smoothie that’s both creamy and comforting.
The essence of the dish:
A velvet‑smooth canvas formed from coconut milk, sweetened just enough to let the vanilla sing, all set without fire or churn.
A fun fact or historical angle:
Early freezer desserts were popular during wartime, when electricity was scarce and families needed treats that required little energy.
Flavor or sensory focus:
You’ll notice the cool kiss of coconut, the lingering warmth of vanilla, and a subtle whisper of salt that balances everything.
You Must Know
-
Keep the mixture cold before the first stir
-
Stir consistently to avoid grainy texture
-
Store in an airtight container for up to three days
Frequently Asked Questions
→ Can I use dairy milk instead of coconut?
Yes, whole milk works well, but the texture will be less rich and the ice cream may become slightly grainier.
→ How long does it take to freeze fully?
About 2‑3 hours for a firm scoop; stir every few minutes for a smoother result.
→ Is this recipe suitable for vegans?
Absolutely, as long as you choose a plant‑based sweetener like maple syrup.
→ Can I add chocolate chips?
Fold them in during the final stirring; they stay crunchy and add a nice contrast.
→ What if the ice cream is too hard?
Let it sit for 5‑10 minutes at room temperature, then give it a gentle stir before serving.
→ Do I need an ice‑cream maker?
No, the whole point is to skip the machine and rely on regular freezer stirring.
Nutrition Facts
per serving
240
Calories
2g
Protein
12g
Carbs
22g
Fat
Taste Profile
Creamy vanilla with a gentle coconut backdrop
Ingredient Substitutions
Don't have an ingredient? Try these alternatives
Texture will be lighter; consider adding a tablespoon of coconut oil for richness.
Similar sweetness level, slightly thinner consistency.
Recipe Variations
Try these delicious twists on the original
Chocolate Swirl
Stir in melted dark chocolate after the first freeze for a rich ribboned effect.
Citrus Burst
Add a tablespoon of orange zest and a splash of orange juice for bright freshness.
Common Mistakes to Avoid
Learn from others' mistakes for perfect results
- Leaving the mixture untouched, leading to icy crystals.
- Using low‑fat coconut milk; result becomes watery.
- Over‑sweetening; the cold can mask flavors.
Meal Prep & Storage
Make Ahead Tips
You can whisk the base and store it refrigerated for up to 24 hours; freeze when ready.
Leftover Ideas
Scoops can be softened in the microwave for 10‑15 seconds, then enjoyed as a soft‑serve.
Perfect Pairings
Serve this with...
Cooking Timeline
Gather and whisk together all base ingredients.
Place mixture in freezer; first stir after 30 minutes.
Stir every 5‑7 minutes to achieve creamy texture.
Add optional mix‑ins and let firm up.
Serve or store for later enjoyment.
 Quick
Quick
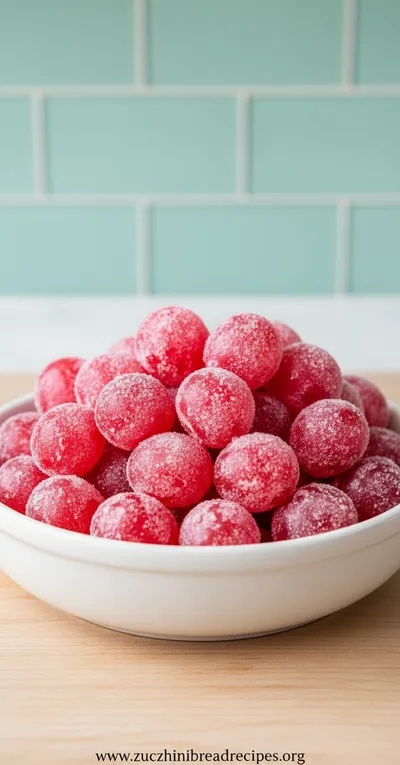
Kool-Aid Grapes Recipe
A quick, colorful snack of grapes soaked in Kool‑Aid for a sweet‑tart bite.
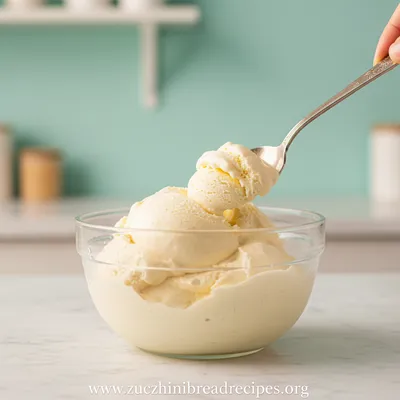
No-Cook Homemade Ice Cream
A silky, no‑cook ice cream that comes together in minutes, letting you relish a cool treat without the hassle of an ice‑cream maker.
Timing
Prep Time
10 Minutes
Cook Time
0 Minutes
Total Time
2 Hours
Recipe Details
Ingredients
Base
-
01
2 cups full‑fat coconut milk
-
02
1/3 cup maple syrup or honey
-
03
1 tsp pure vanilla extract
-
04
Pinch of sea salt
Optional Mix‑ins
-
01
1/2 cup fresh berries or sliced mango
-
02
2 tbsp cocoa nibs or dark chocolate chips
Instructions
In a medium bowl, whisk together coconut milk, maple syrup, vanilla, and sea salt until fully combined.
Place the bowl in the freezer. After 30 minutes, remove and stir vigorously to break any forming ice crystals.
Return to the freezer and repeat stirring every 5‑7 minutes for the next 1‑1.5 hours, or until a soft‑serve texture forms.
Fold in optional mix‑ins, then let the ice cream firm for an additional 30 minutes.
Scoop into bowls, garnish if desired, and enjoy the cool, creamy sweetness.
Notes & Tips
-
1
If you prefer a sweeter treat, add a bit more maple syrup before the first freeze.
-
2
Using a metal bowl speeds up the chilling process.
-
3
For a richer flavor, toast the coconut milk in a pan briefly before mixing (optional).
 Classic
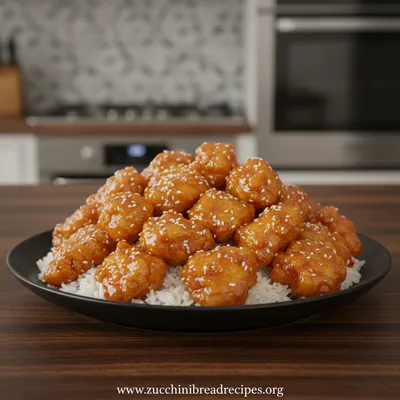
Orange Chicken – Crispy Tangy Sauce
Crispy orange chicken with a glossy, sweet‑tangy sauce—quick, satisfying, and classic.
Tools You'll Need
-
Medium mixing bowl
-
Whisk
-
Freezer‑safe container
-
Wooden spoon or spatula
-
Measuring cups
Must-Know Tips
-
Stir consistently to avoid grainy texture.
-
Cover tightly to prevent freezer burn.
-
Taste before freezing; adjust sweetness if needed.
Professional Secrets
-
Chill the bowl before adding ingredients; it helps set the base faster.
-
Freeze in shallow layers for quicker, even cooling.
-
A pinch of salt amplifies the vanilla aroma.

Recipe by
Emma Harper🥖✨ Lover of timeless recipes, cozy kitchens, and golden loaves. Always baking memories with love ❤️🍽️.
Get Delicious Recipes Weekly
Join 25,000+ home cooks getting our best recipes straight to their inbox.
Free forever • No spam • Unsubscribe anytime